Quick Start Guide to Print Your PDF (1 minute read)
How to print and ship your pdf in just a few simple steps:
1.) Click the green Start Here button to upload your first PDF.
2.) Review the default print & binding options, choose others if desired.
Note 1- Printing types: All printing types are double-sided unless indicated otherwise. Choose from BW, Color, or BW with 1st Page Color, or, BW-Single Sided.
Note 2- Binding types: We only display binding options that will fit your PDF. If you choose a binding, we automatically place a clear front cover over your 1st page, and a black quality vellum cover on the back. A GBC binding is included in the base charge. Other binding types can be found here. If you choose BW-Single Sided, only unbound options are available.
3.) Input your billing address.
4.) The default shipping address is your billing address. This can be changed by clicking the checkbox next to your shipping address. Click the green button to continue/accept changes. We ship to the United States and Canada.
Pro tip: At this step, you can also add other addresses manually, or by CSV file. The site will automatically update the printing and binding charges to extend to the additional addresses.
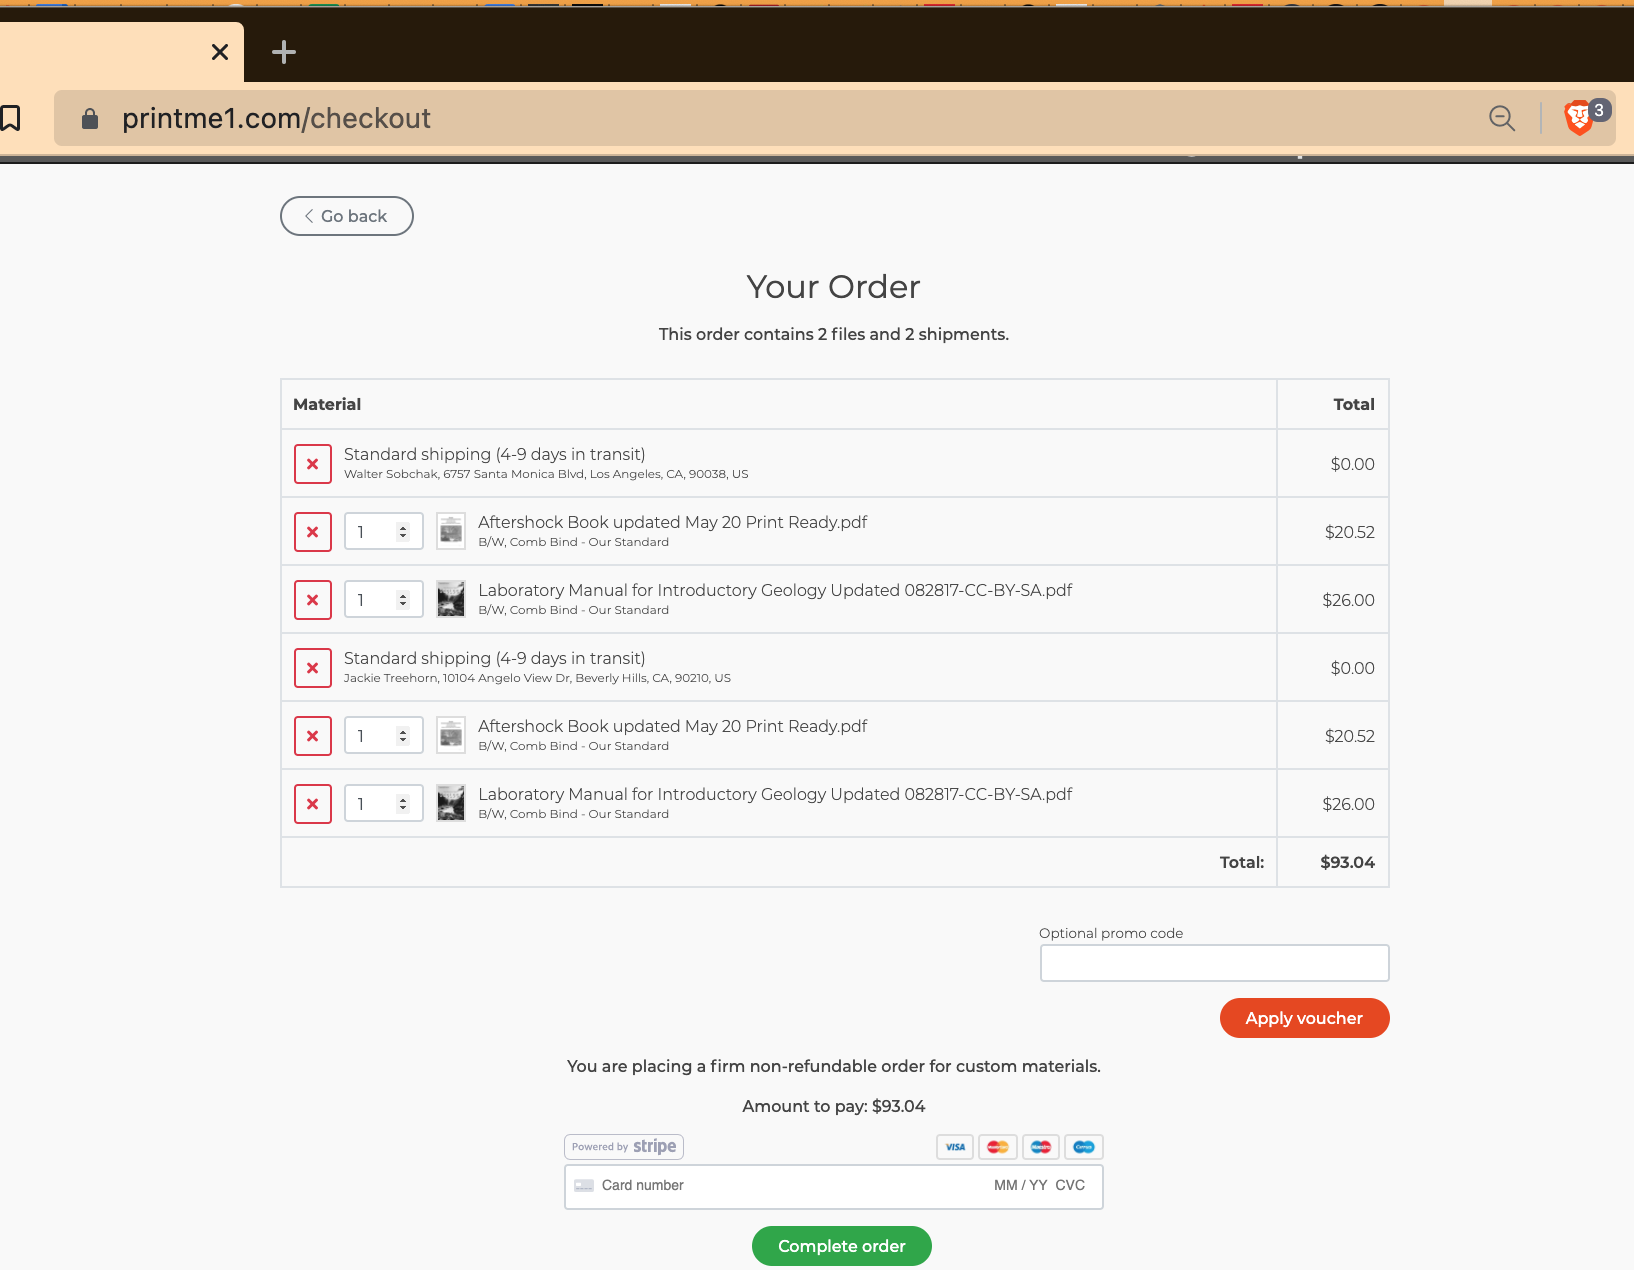
5.) Review your order details. If you have multiple addresses, the prints are displayed by address, shipping method, then the prints to be sent to the address.
6.) Input payment method and complete payment and you're done. Simple!
For more specific details and information about our simple pdf printing service, please continue reading below.
Also see:
Introduction
New to printMe1.com? Looking for a little more information on how to print your PDF? Has printMe1 changed since the last time you used the site and want to find our more? This article is for you!
Before we start, if you haven't used printMe1.com yet, it's definitely much faster to do a typical order than to read everything in this post. Our site is simple and super easy to use. A typical order can be completed in a minute or two after the PDF is uploaded. No log-in's required. Just click the green button to upload your first PDF and see for yourself!
It's been awhile since we covered our Simple Print Service™. Just upload a PDF and get a print. It sounds so simple, but it took the mad scientists of printing to figure out how to make it work as easy as it does and ship in 48 business hours or less. What's more, we've added so many features and improvements lately that it's time to take a fresh look at everything that happens when placing a print order.
The process for typical orders remains simple and easy to use, while we've layered in some slick improvements that extend the site's capabilities, especially for group situations.
In this post, we'll go step by step through an order from start to finish and explain the options you'll see in a typical order.
When it comes to printing PDF's, most people have one PDF to print and are shipping it to their home address. That's definitely self-explanatory and very intuitive on our site, so for this tutorial just to show some of the site's unique capabilities, we'll show two PDF's going to two different addresses, neither of which are the same as the billing address. If you are interested in the basic situation, you can skip over the extra information on multiple PDF's and addresses that doesn't apply.
This tutorial follows along the standard and typical order flow used for every transaction. Uploading your PDF or PDF's, then setting details like print type, binding type, and quantity, then inputting billing details, shipping details, review, and payment.
If a user is visiting from a PDF Hosting link and paying for their own prints, this is post will walk through the checkout process those users will see after they click the link to order a print from a hosted PDF.
Before we move on, using the site is a breeze! Just click the green button to upload your first PDF to start an order, then checkout in a few clicks in a minute or two max! Your prints will be printed, bound and shipped within 48 business hours from then.
Also be sure to check out our How It Works page and FAQ for more information.
Getting Started
All you need to use our site is a device with the PDF stored on it, a modern web browser, and a connection to the internet. Our site works web browsers on mobile devices, laptops, and computers.
Make sure you know where the PDF is stored on your device. Often on all devices, there is a default location for downloads to be stored. If you downloaded your PDF to your device, you'll need to know where it's stored.
Upload Your PDF(s)
Go to printMe1.com, and click the green "Start Now" button. This initiates the process and will open a file browser box to locate the file or files you want to print in your device's storage.
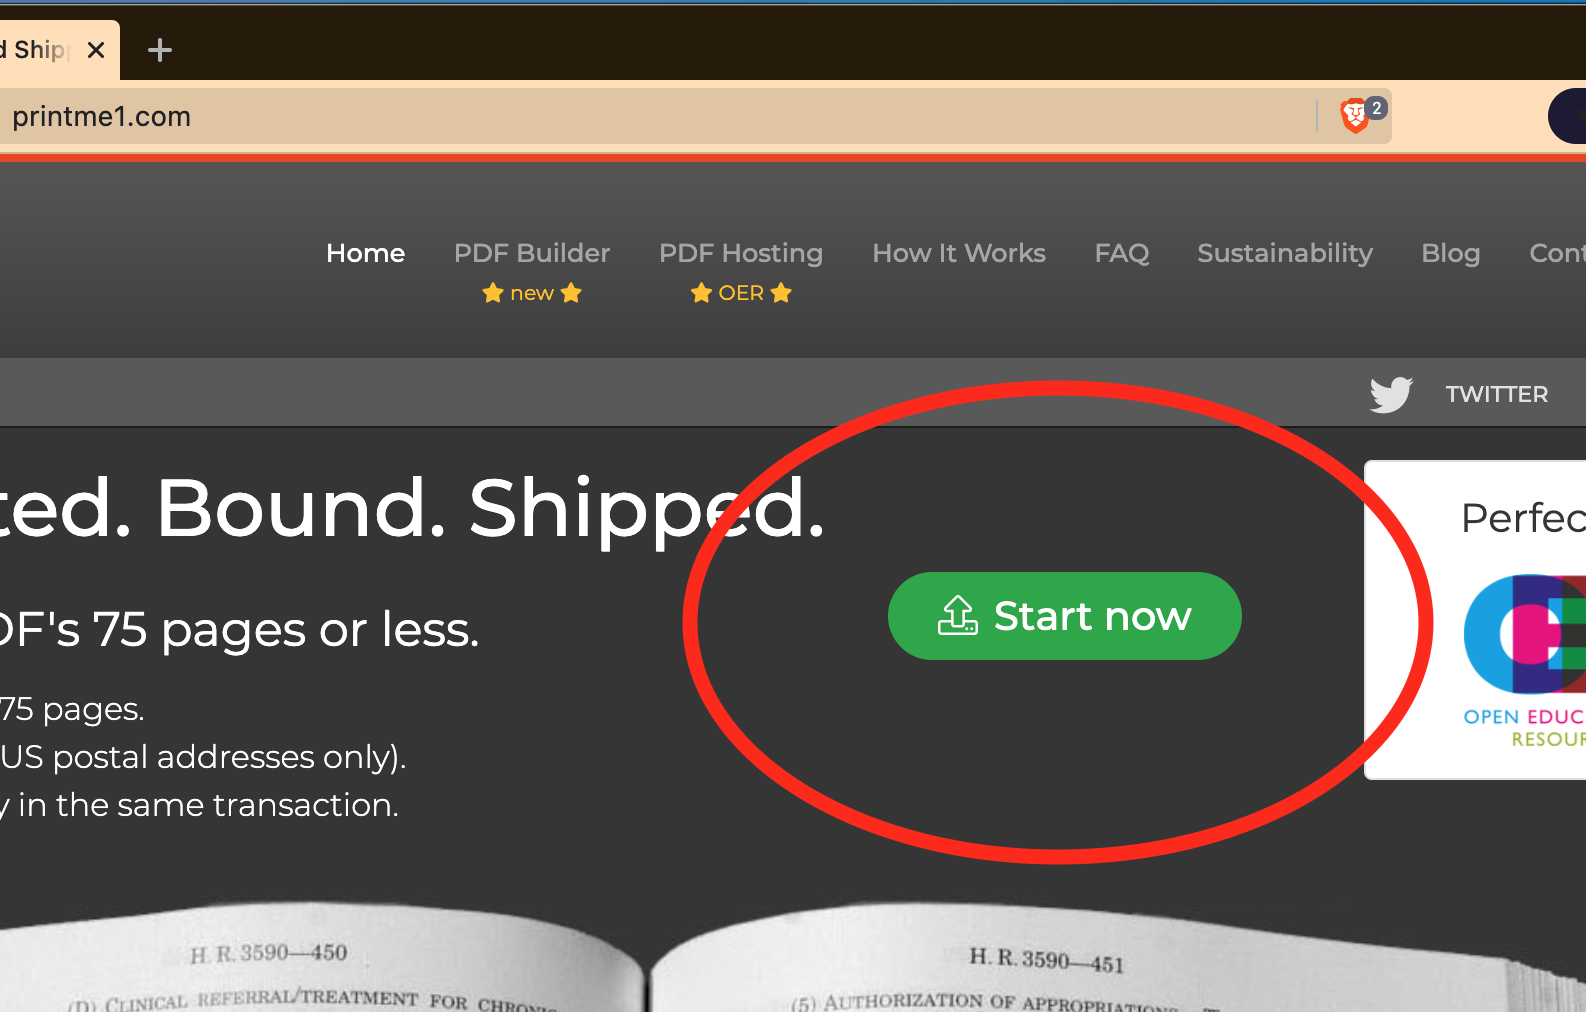
After clicking the Green Button, a dialog box opens up on your device to locate your PDF or PDF's.
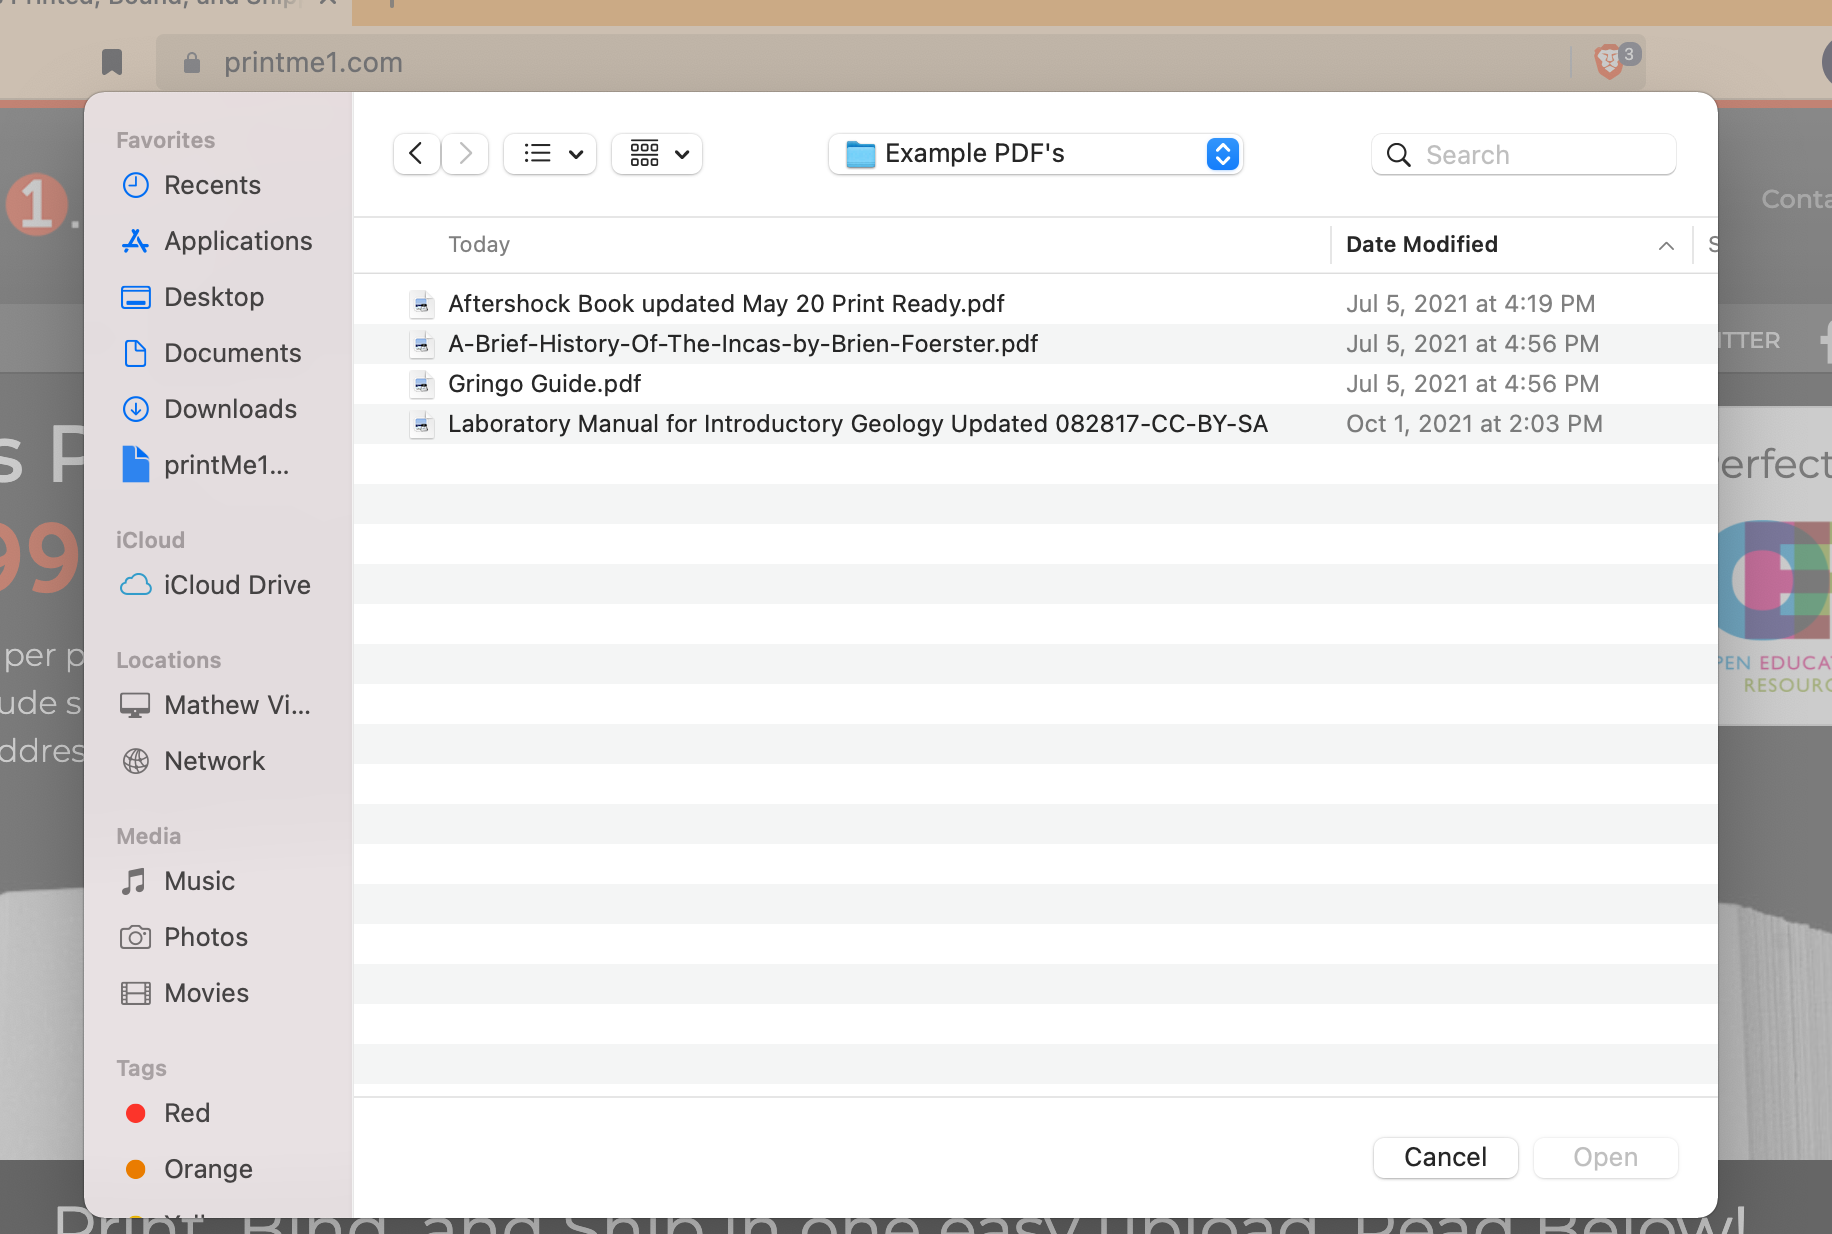
If you want to print & bind multiple PDF's in the same financial transaction, you can highlight multiple files to upload at once by clicking "command"+"shift" as you select files. This will upload multiple PDF's at the same time. Then click "Done" to start uploading.
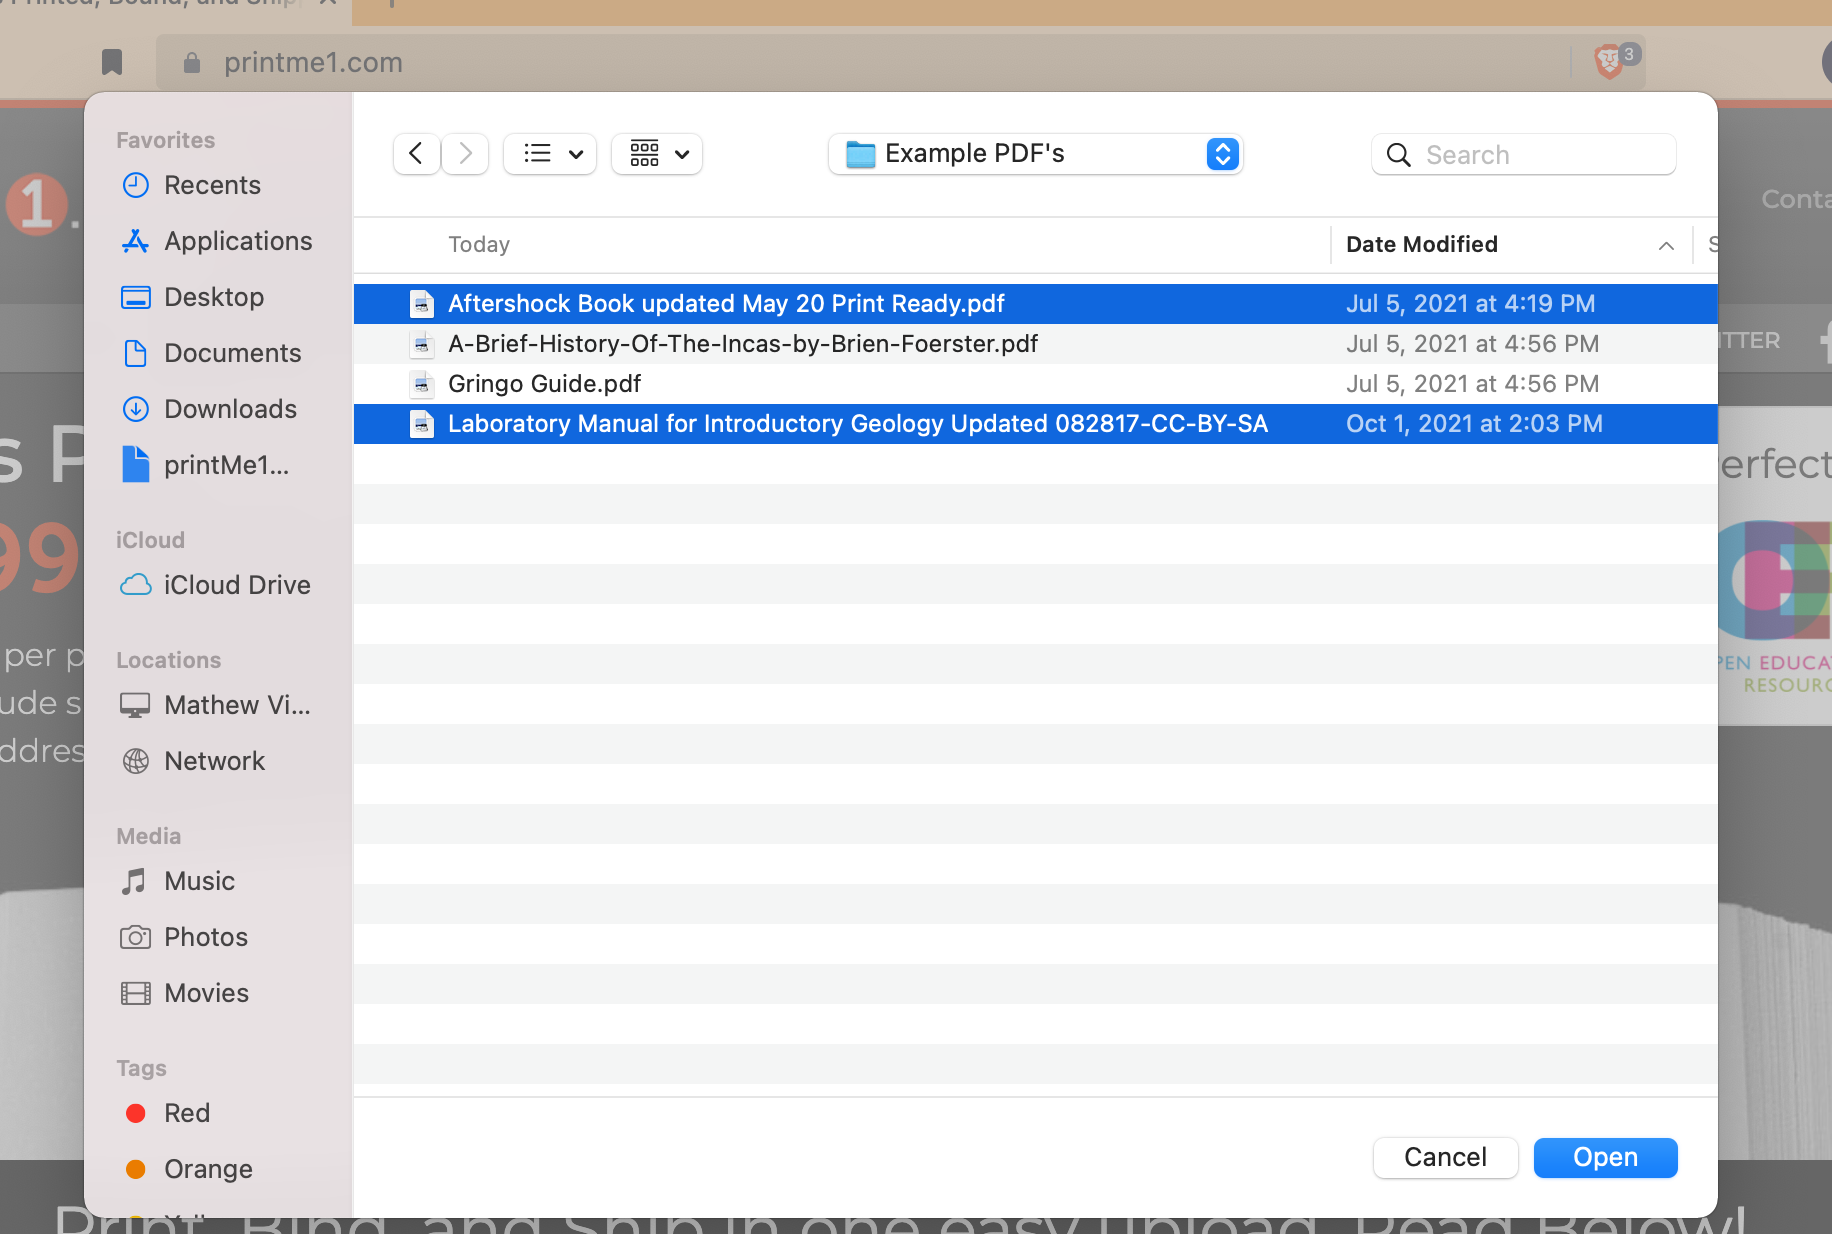
Once you select your PDF file or files and click "Open", the site will automatically begin uploading the PDF's and return you to the home page with a progress bar displaying the uploading status.
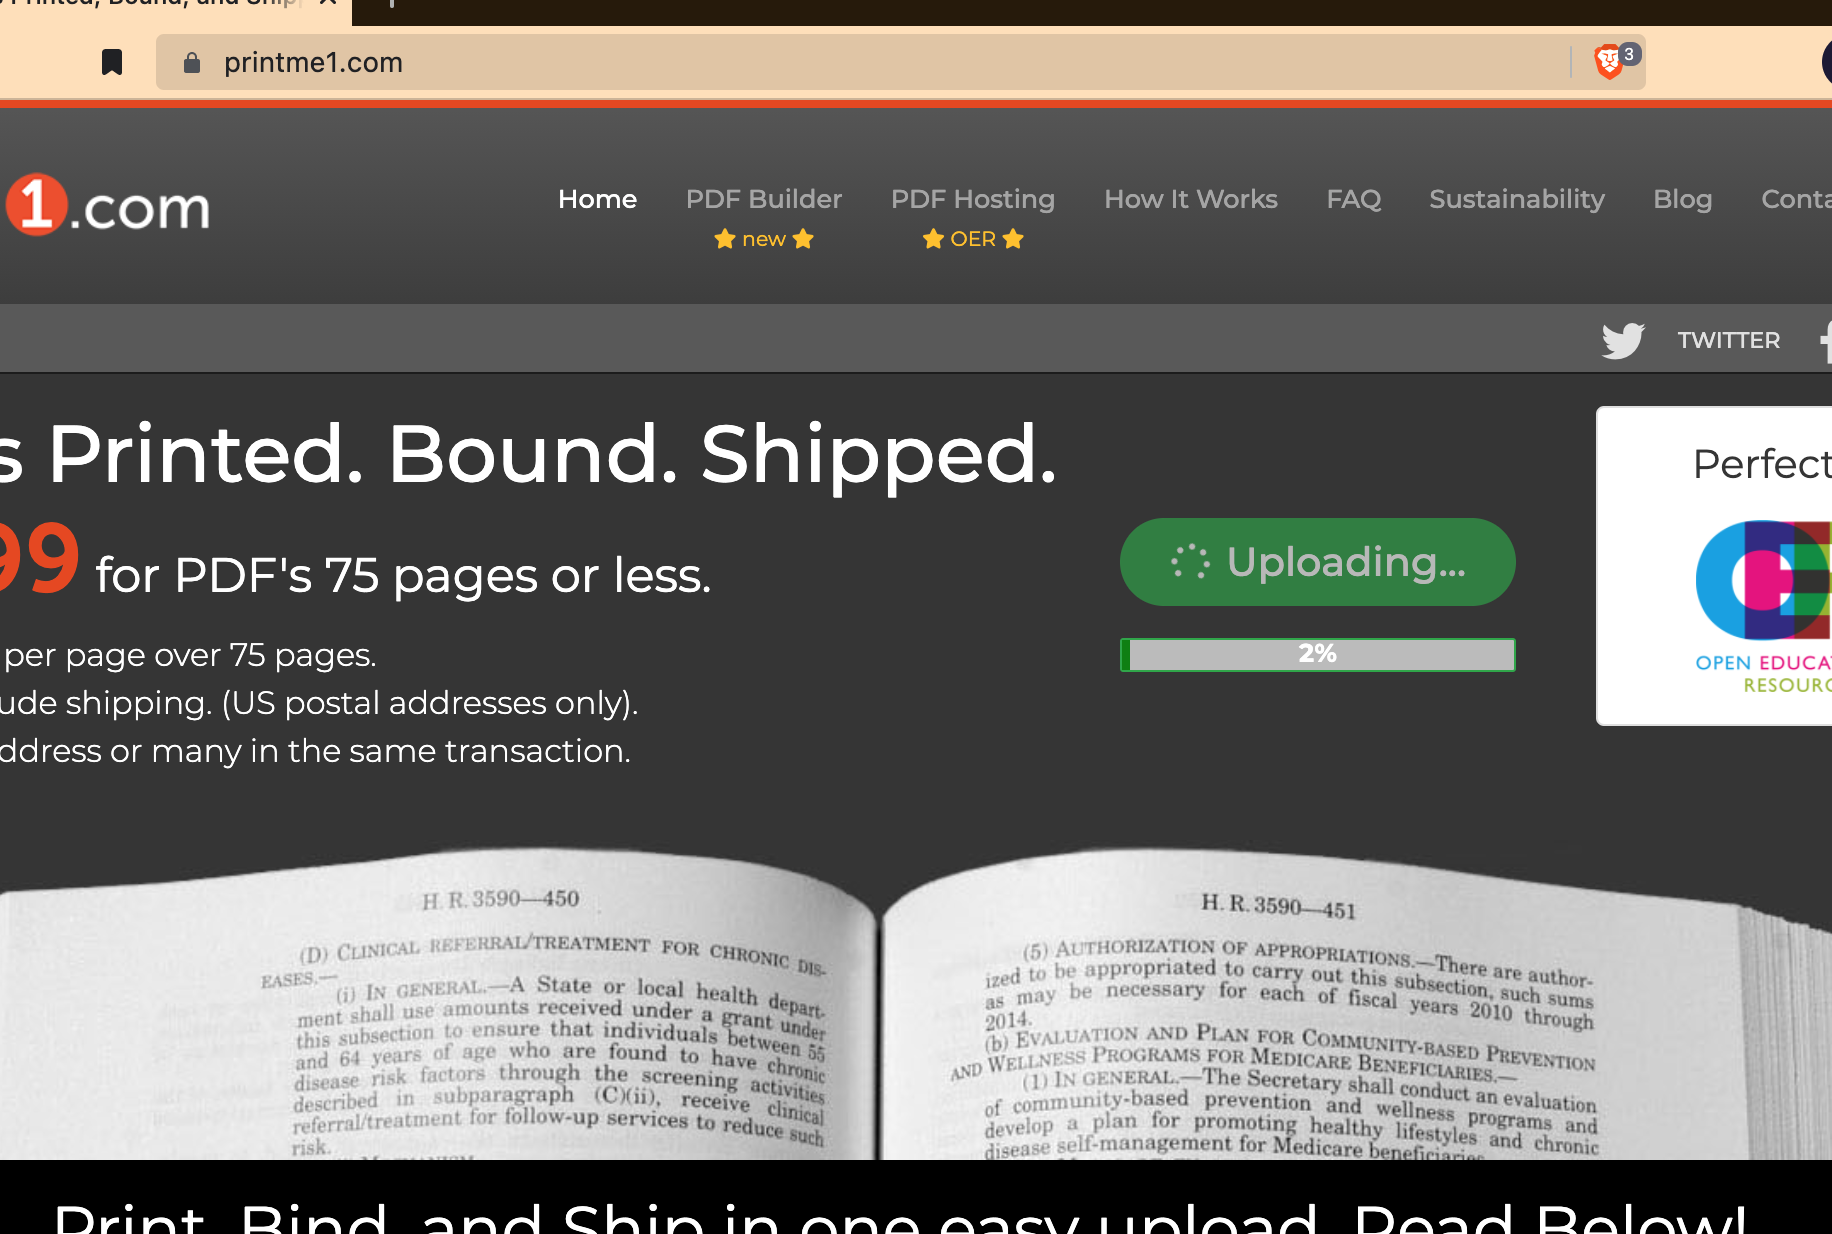
Important Tip: How to advance if you are returning to the site from a prior session with an upload
If you are returning to the site from a prior session and want to use the PDF file you uploaded previously, please click "Continue my previous order" under the logo. The site will store prior activity in your browser, and will not allow the same PDF to be uploaded more than once in the same session, so you'll see an error message if you upload the same file again. Just click "Continue my previous order" to advance to checkout.
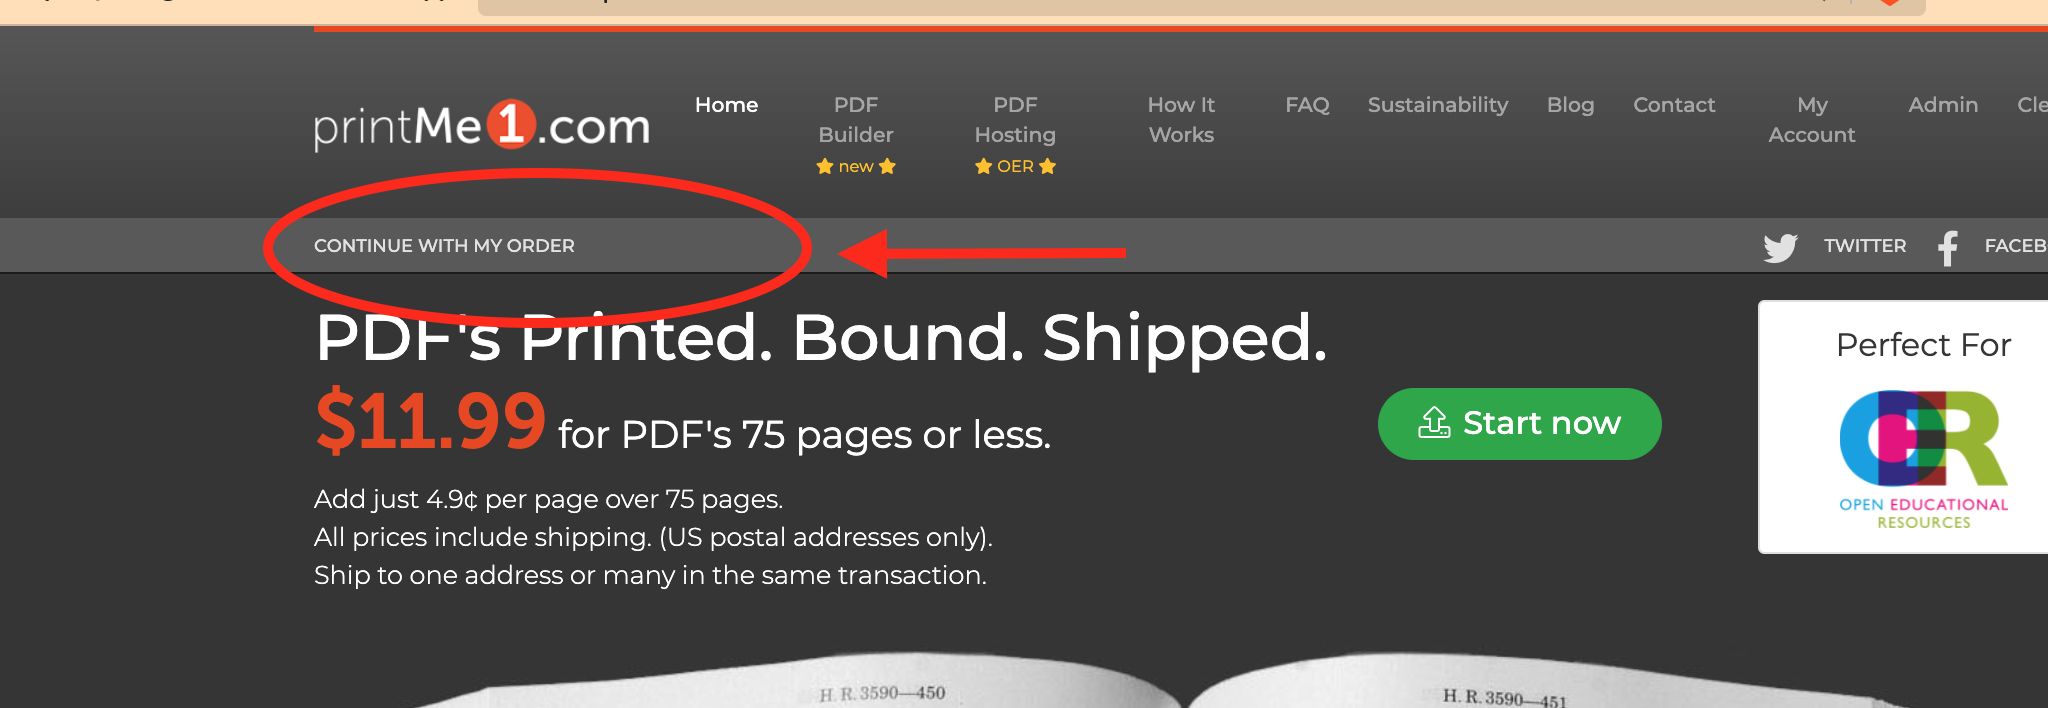
Notes & Answers to Common Questions:
When we refer to multiple PDF's in the same financial transaction, we mean each PDF uploaded will be printed and bound separately. Our Simple Print Service™ treats each PDF as its own job. Not to be confused with combining multiple PDF's, then printing them together in the same book, which requires the PDFs to be combined first. If you want to combine multiple PDF files to be bound in one document, start at our PDF Builder in the top menu bar and upload them all there. The PDF Builder will combine multiple PDF's into one PDF, provide a downloadable proof, and then offer an option to advance that combined PDF into checkout.
No log-in is required to place an order, but if you use advanced payment features like paying from an account balance, or want to track past order information, you will want to log-in. New users are offered the option to set up an account at the end of their order, so no need to do that in this step unless you want to set up an advanced payment feature or are setting up a PDF for PDF Hosting. New users can create an account before completing the transaction by clicking "Login" at the top right, and clicking Sign Up.
Choose Your Print and Binding Types
When the upload is complete, the site advances to checkout. Here you indicate the print and binding details for each PDF. The number of PDF's in the transaction is listed at the top. The filename of the first PDF is displayed, and this means any details you input in the following fields apply to PDF file that is displayed.
Printing Type:
The Printing Type drop down indicates the type of printing for the displayed PDF:
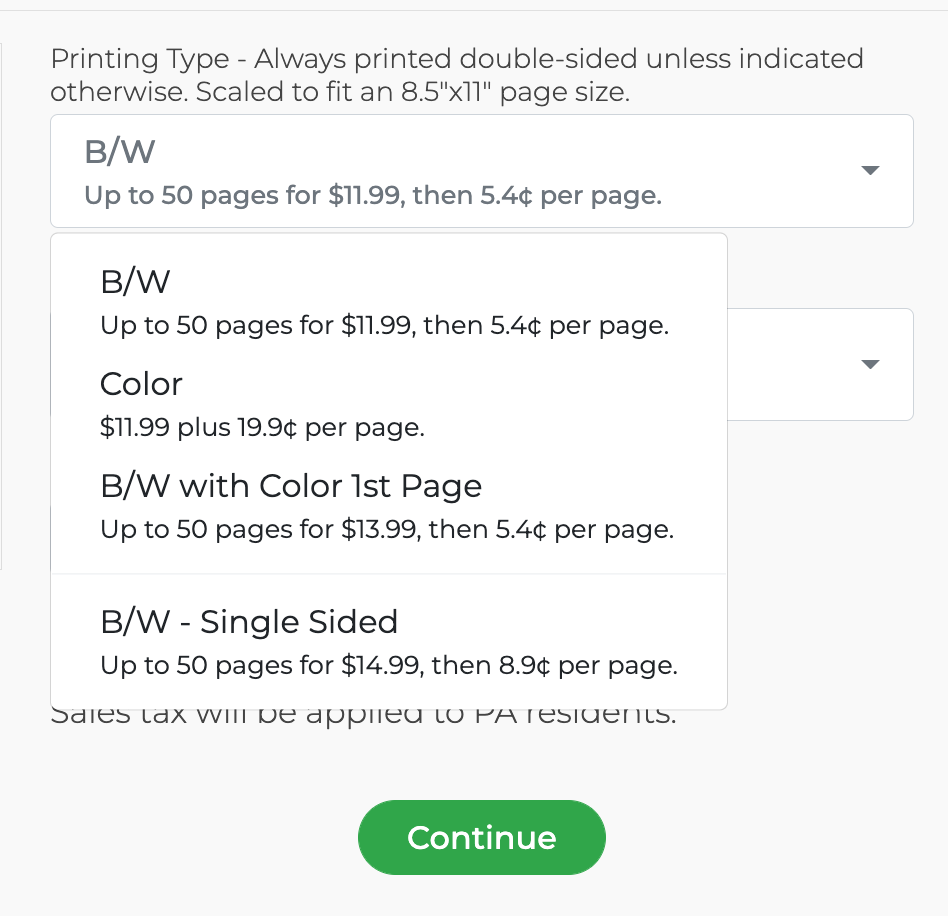
For orders with multiple PDF files, each PDF file can have a different quantity, printing type, or binding type.
The prices for each printing type are displayed.
Note that our service only prints double sided unless indicated otherwise.
Print Type Options:
We have four options to choose for printing your entire PDF:
B/W means all black and white printing, double-sided. This is the most affordable option and is the default.
Color means all color printing, double-sided.
B/W w Color 1st Page means the 1st page will appear in color, and the rest of the page will be black and white, double-sided.
BW- Single Sided means all black and white printing, single sided. The binding options for this type are limited to 3HP and No Binding.
Answers to Common Questions:
Our service prints double-sided unless indicated otherwise in the name of the print type.
We unfortunately do not have a way to print some pages in color and some in black & white.
If your PDF has dimensions that differ from US Letter, 8 ½"x 11", we print the PDF to fit a US Letter page. If the PDF has no margin, we will scale it down about 3% to create room for the binding.
We are not able to print to the edge of the sheet.
Binding Type:
This drop down lists the binding options that will fit your PDF:
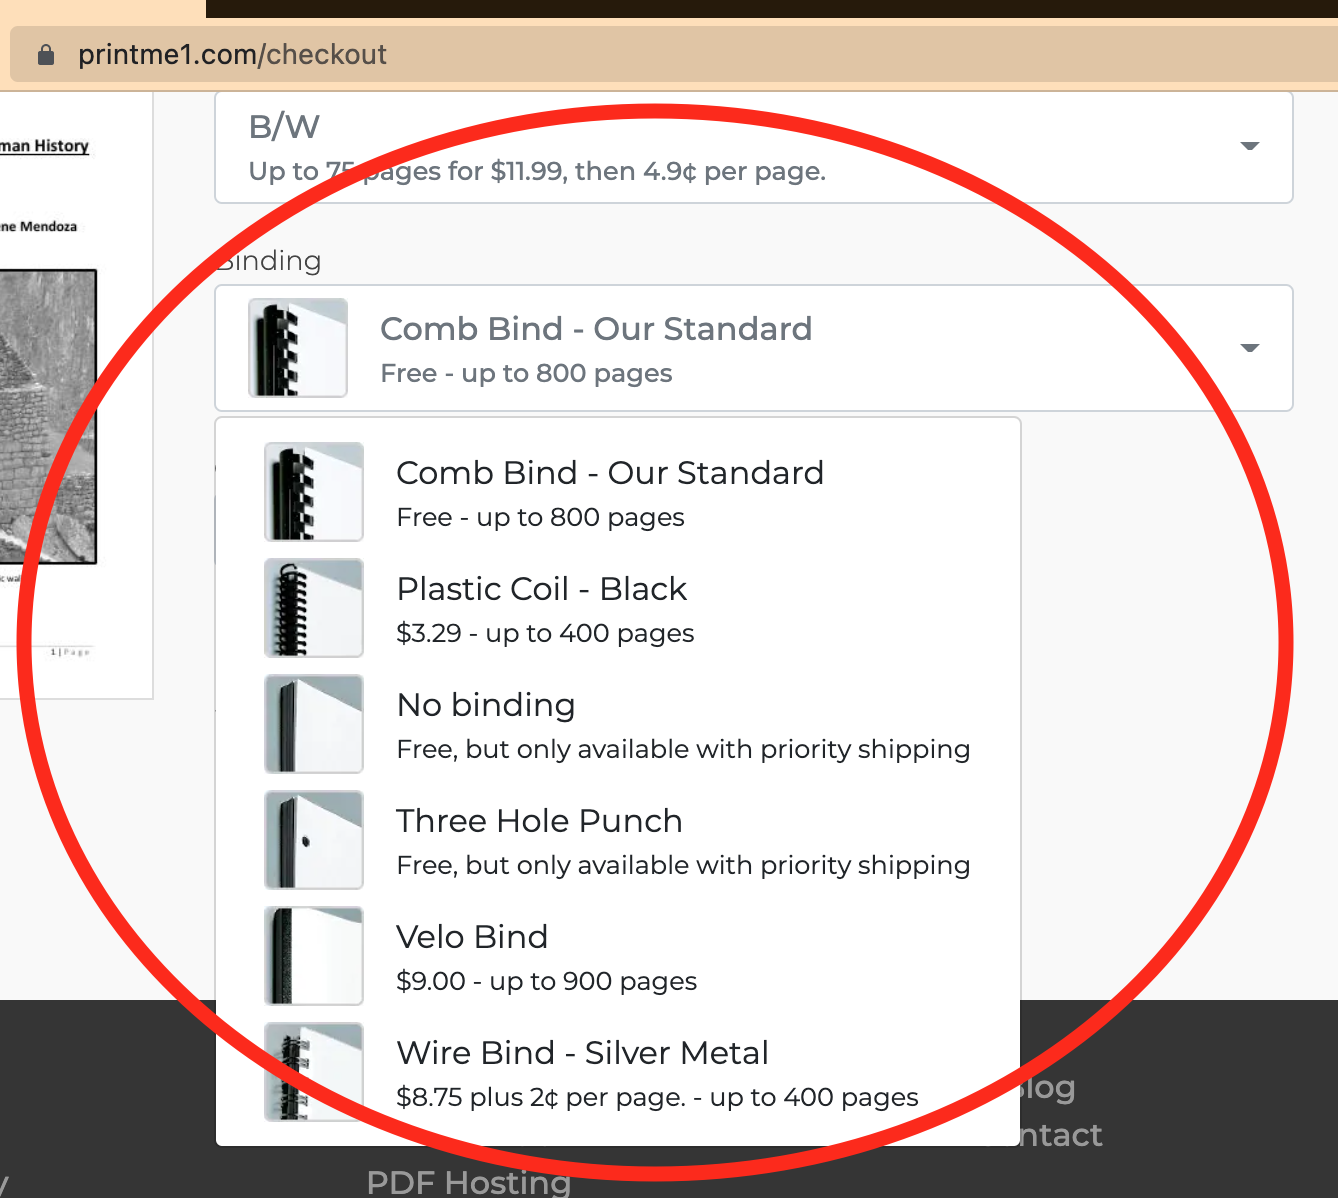
The binding types are Comb Bind, Plastic Coil, Wire-o, Velo, 3 Hole Punch (3HP), and No Binding.
To learn more about all of these binding types, please check out this post.
Note that there are page count limits for some binding types, so if your PDF has too many pages for any particular binding type, that binding type will not be selectable. Our site only allows you to select from bindings that will fit your PDF after it's printed double sided.
If you have a PDF over 900 PDF pages that exceeds all of our mechanical binding options, the only options are "No Binding" and "3HP". No Binding means we are sending a stack of double sided prints that you can use like that, or take them to a local place to bind in volumes. 3HP means the stack of double sided prints will be punched for a standard three ring binder. (Binder not included.)
If you have selected BW- Single Sided as your print type, the only binding options available are 3HP and No Binding.
Copies:
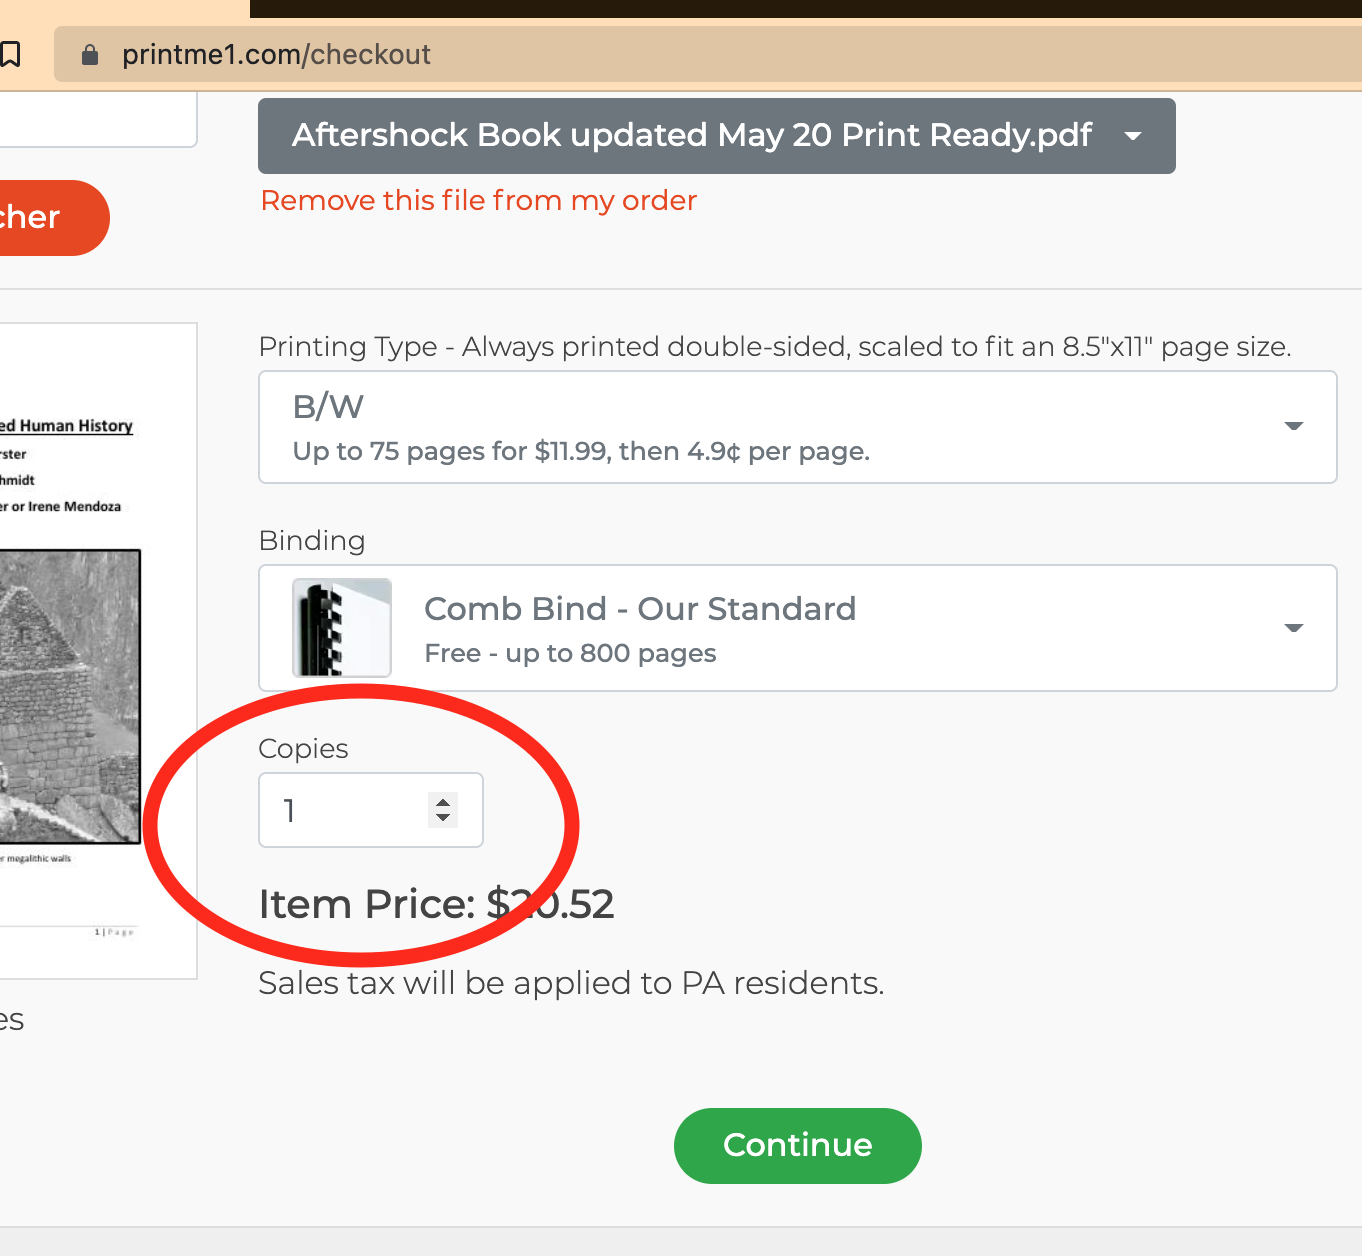
Use the Copies field to indicate how many copies you want shipped to your address.
If you are using one of our advanced features that allows you to ship to multiple & different addresses in the same transaction, only indicate the number of copies each address will receive. (Ex: If you have 100 recipients each receiving 1 print in the mail, just indicate "1" here. The site will figure out the & charge for the extra sets needed when you input multiple addresses later. If you want to receive the multiple prints yourself to distribute from a central location, then you would choose 100 to ship them all to one address.)
Selecting details for multiple PDF's in the Same Transaction:
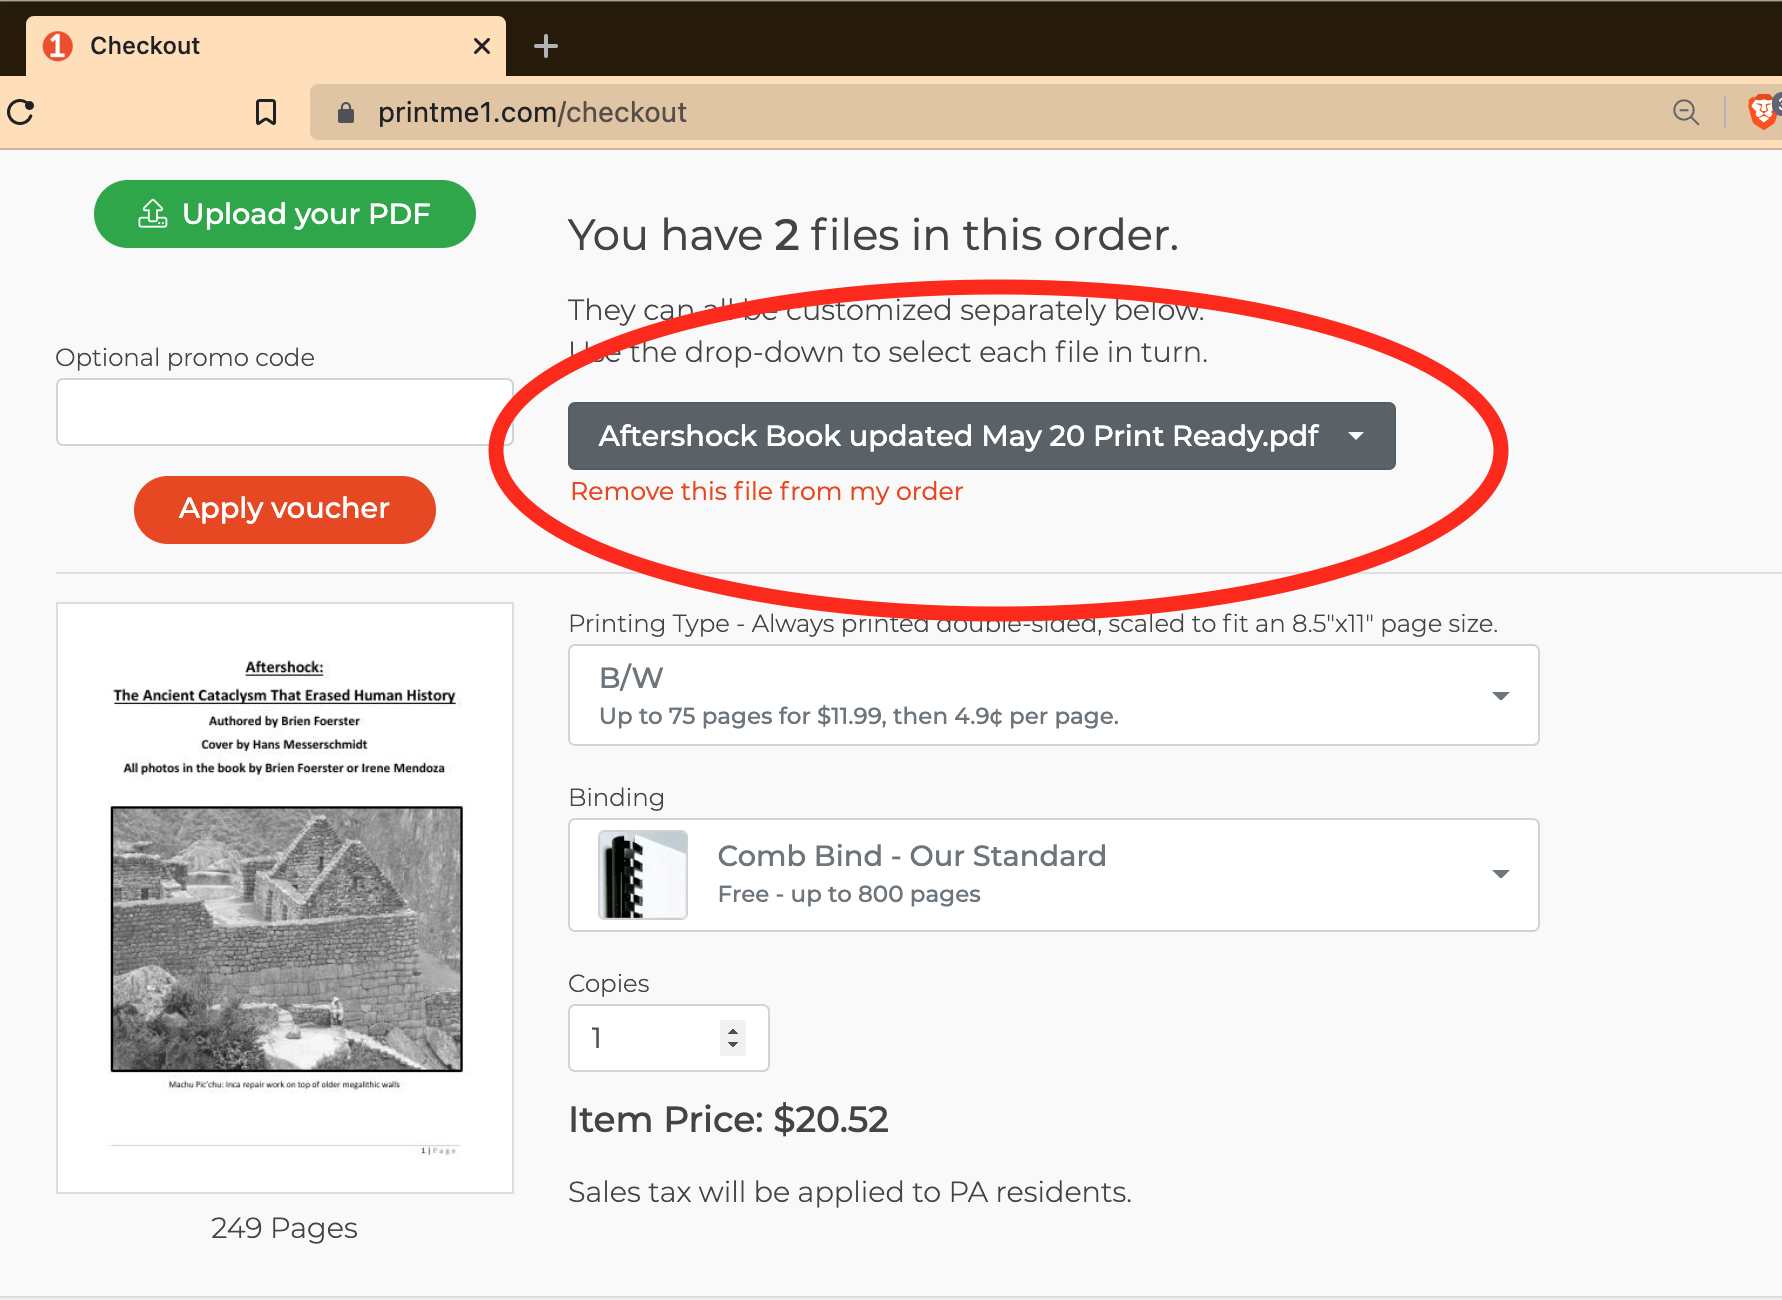
The PDF filename associated with the printing/binding/copies details is displayed at the top (circled in the image below)
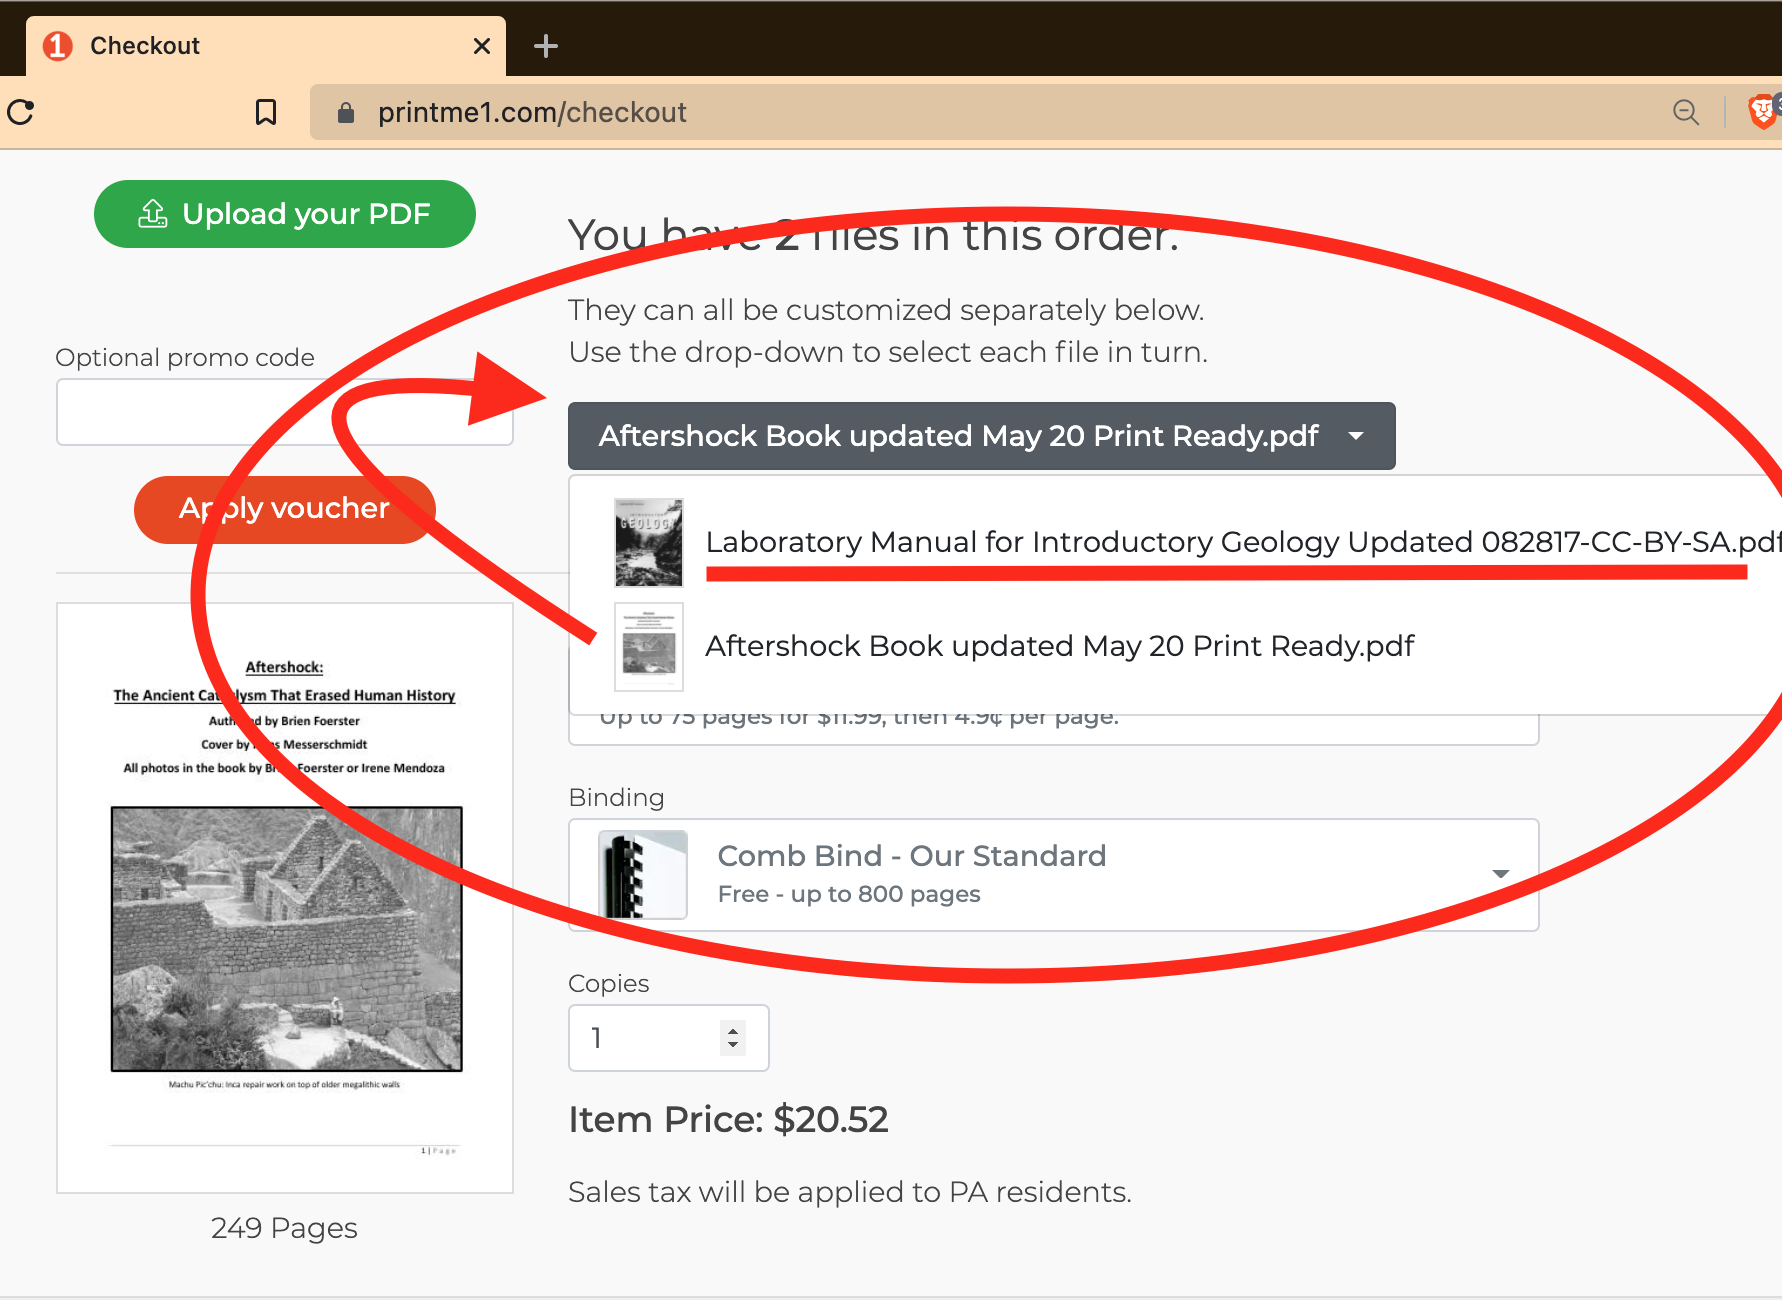
To choose options for any other PDF's in your checkout, click the dropdown where the current PDF's filename is displayed (again, circled area below):
When you click the dropdown, any other PDF's in your order will appear in the menu. The underlined PDF is the one we want to select next:
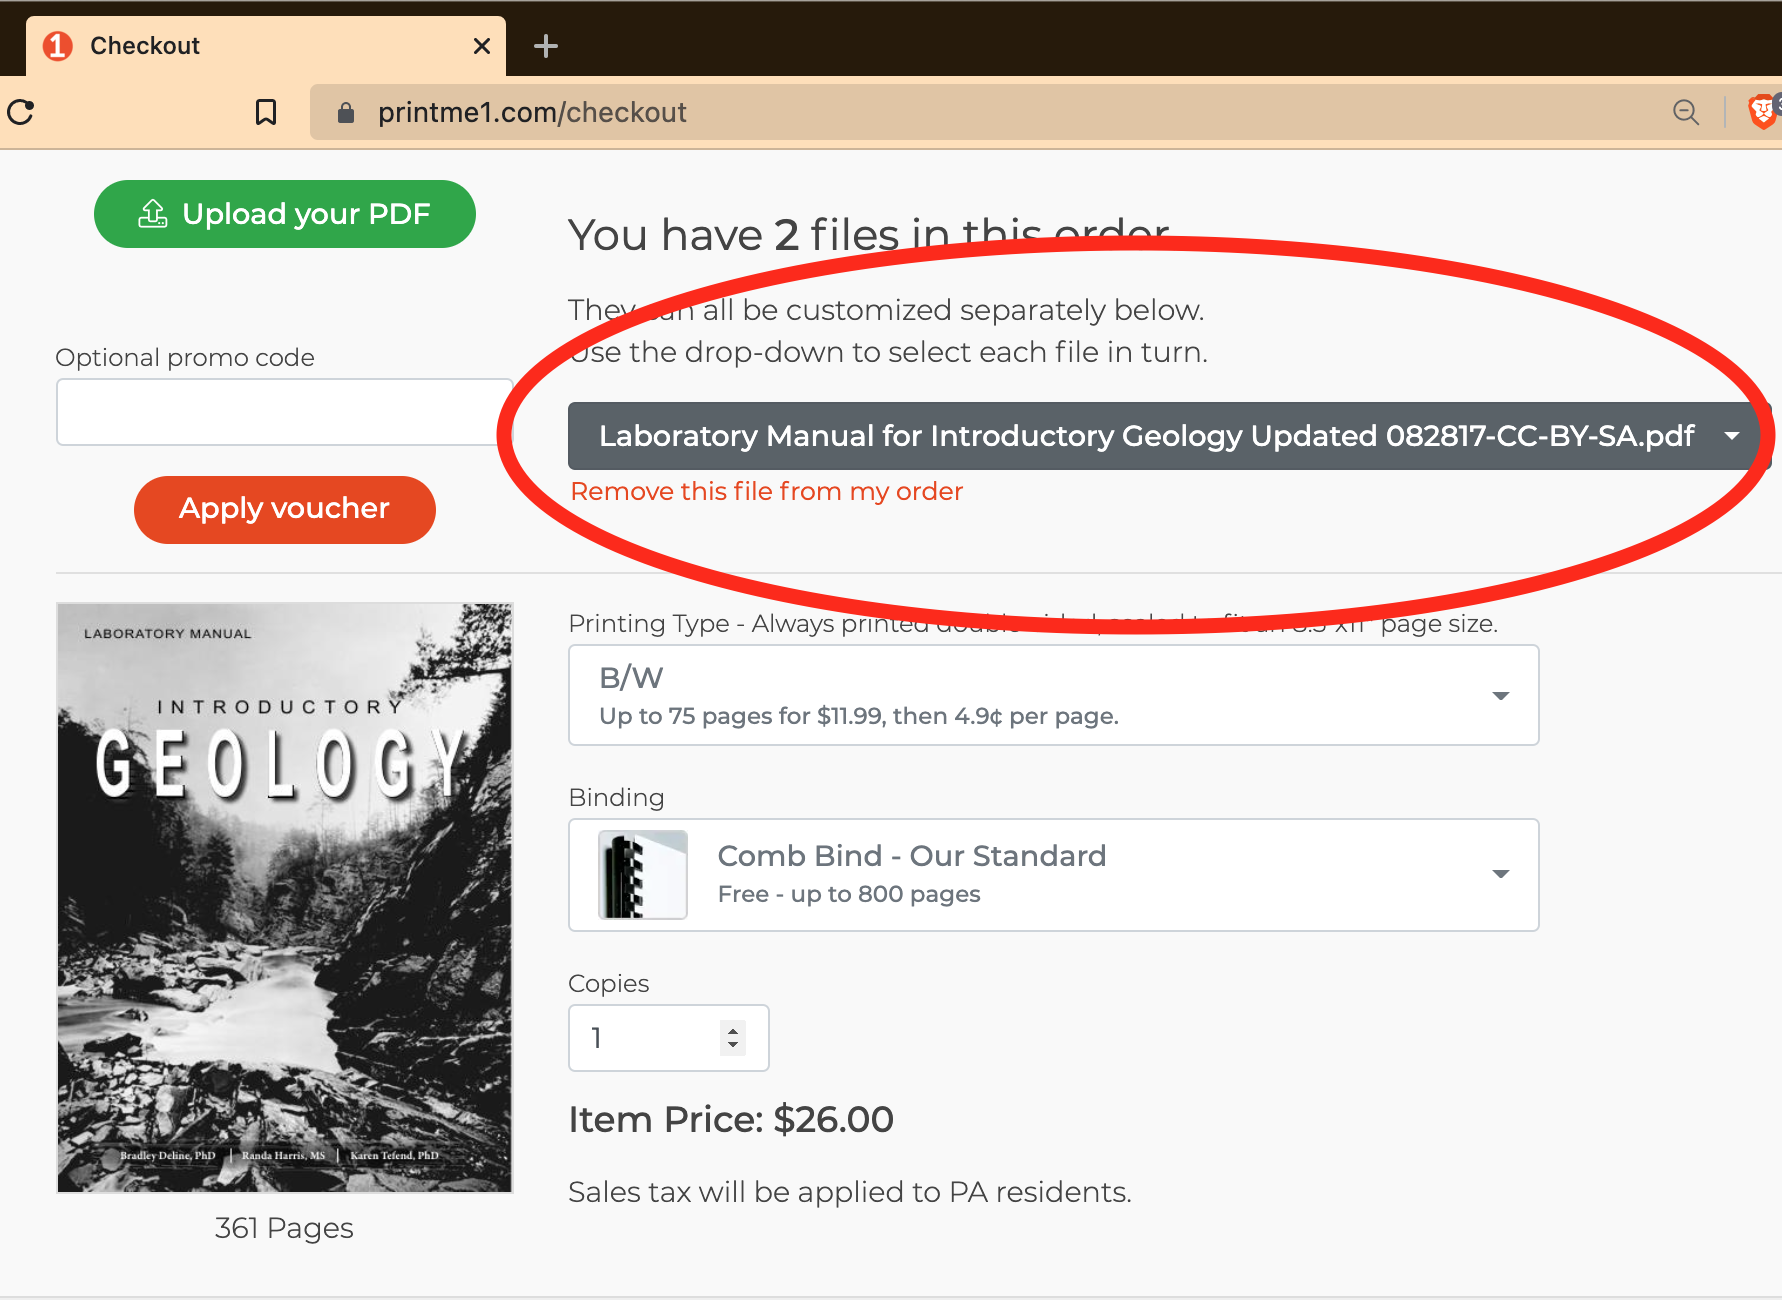
After selecting the new PDF, the new filename appears at the top, and means any details indicated below will apply to the new PDF:
After Setting Details For Each PDF, Click the Green "Continue" Button
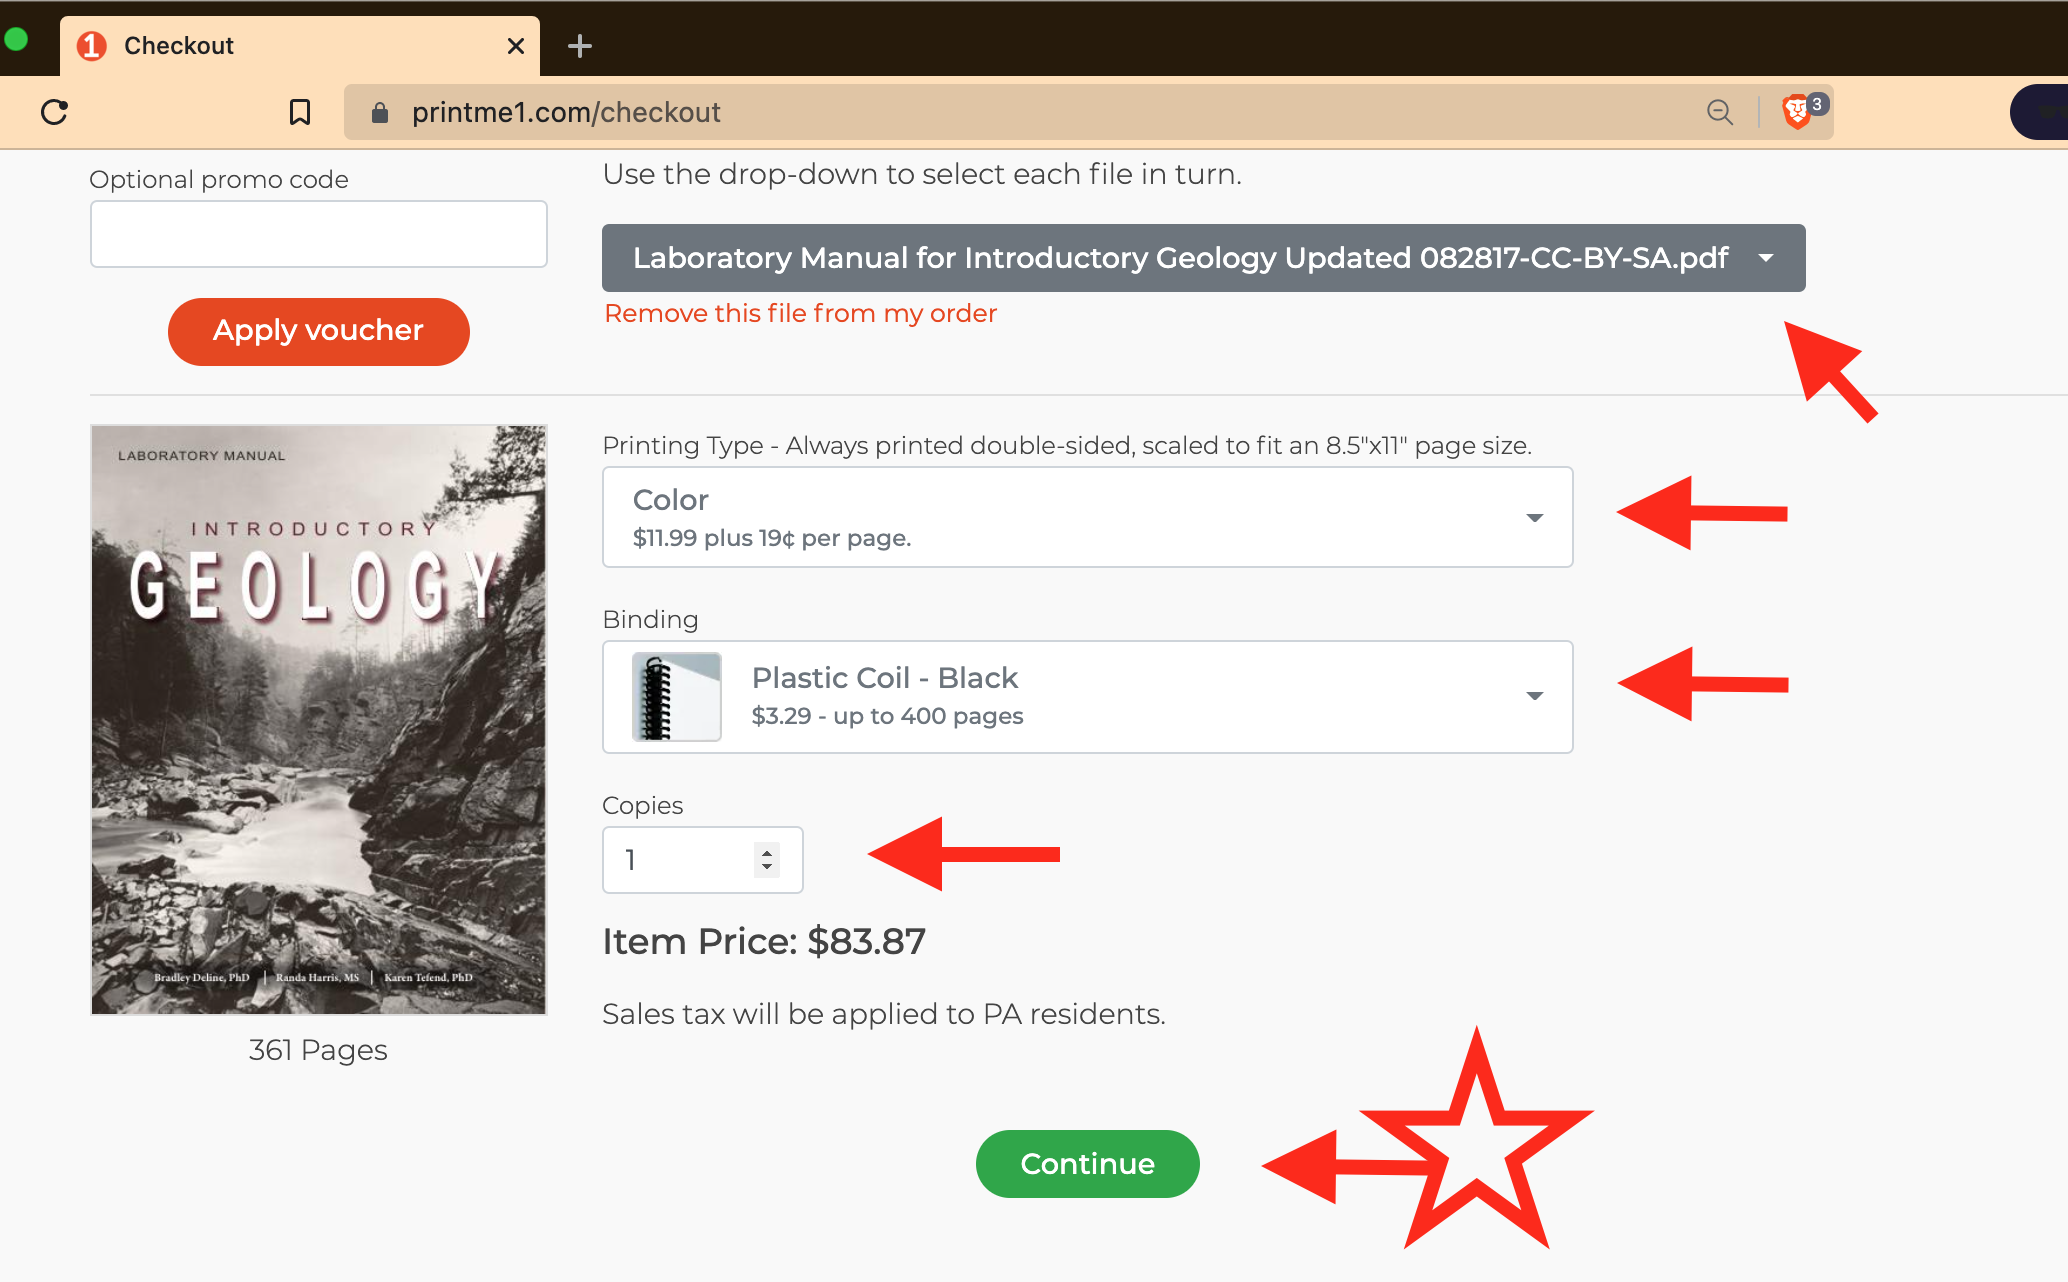
Notes & answers to common questions:
The estimate price for the entire print order (so far) is displayed in the footer. The price will update as you change options.
If you uploaded a PDF and want to remove it from the order, select the PDF to be removed using the filename dropdown to bring it to the front, then click "Remove this PDF from my order" located in orange under the current PDF in the menu.
If you want to add another PDF to the order click the green "Upload your PDF" button.
Enter your Billing Details
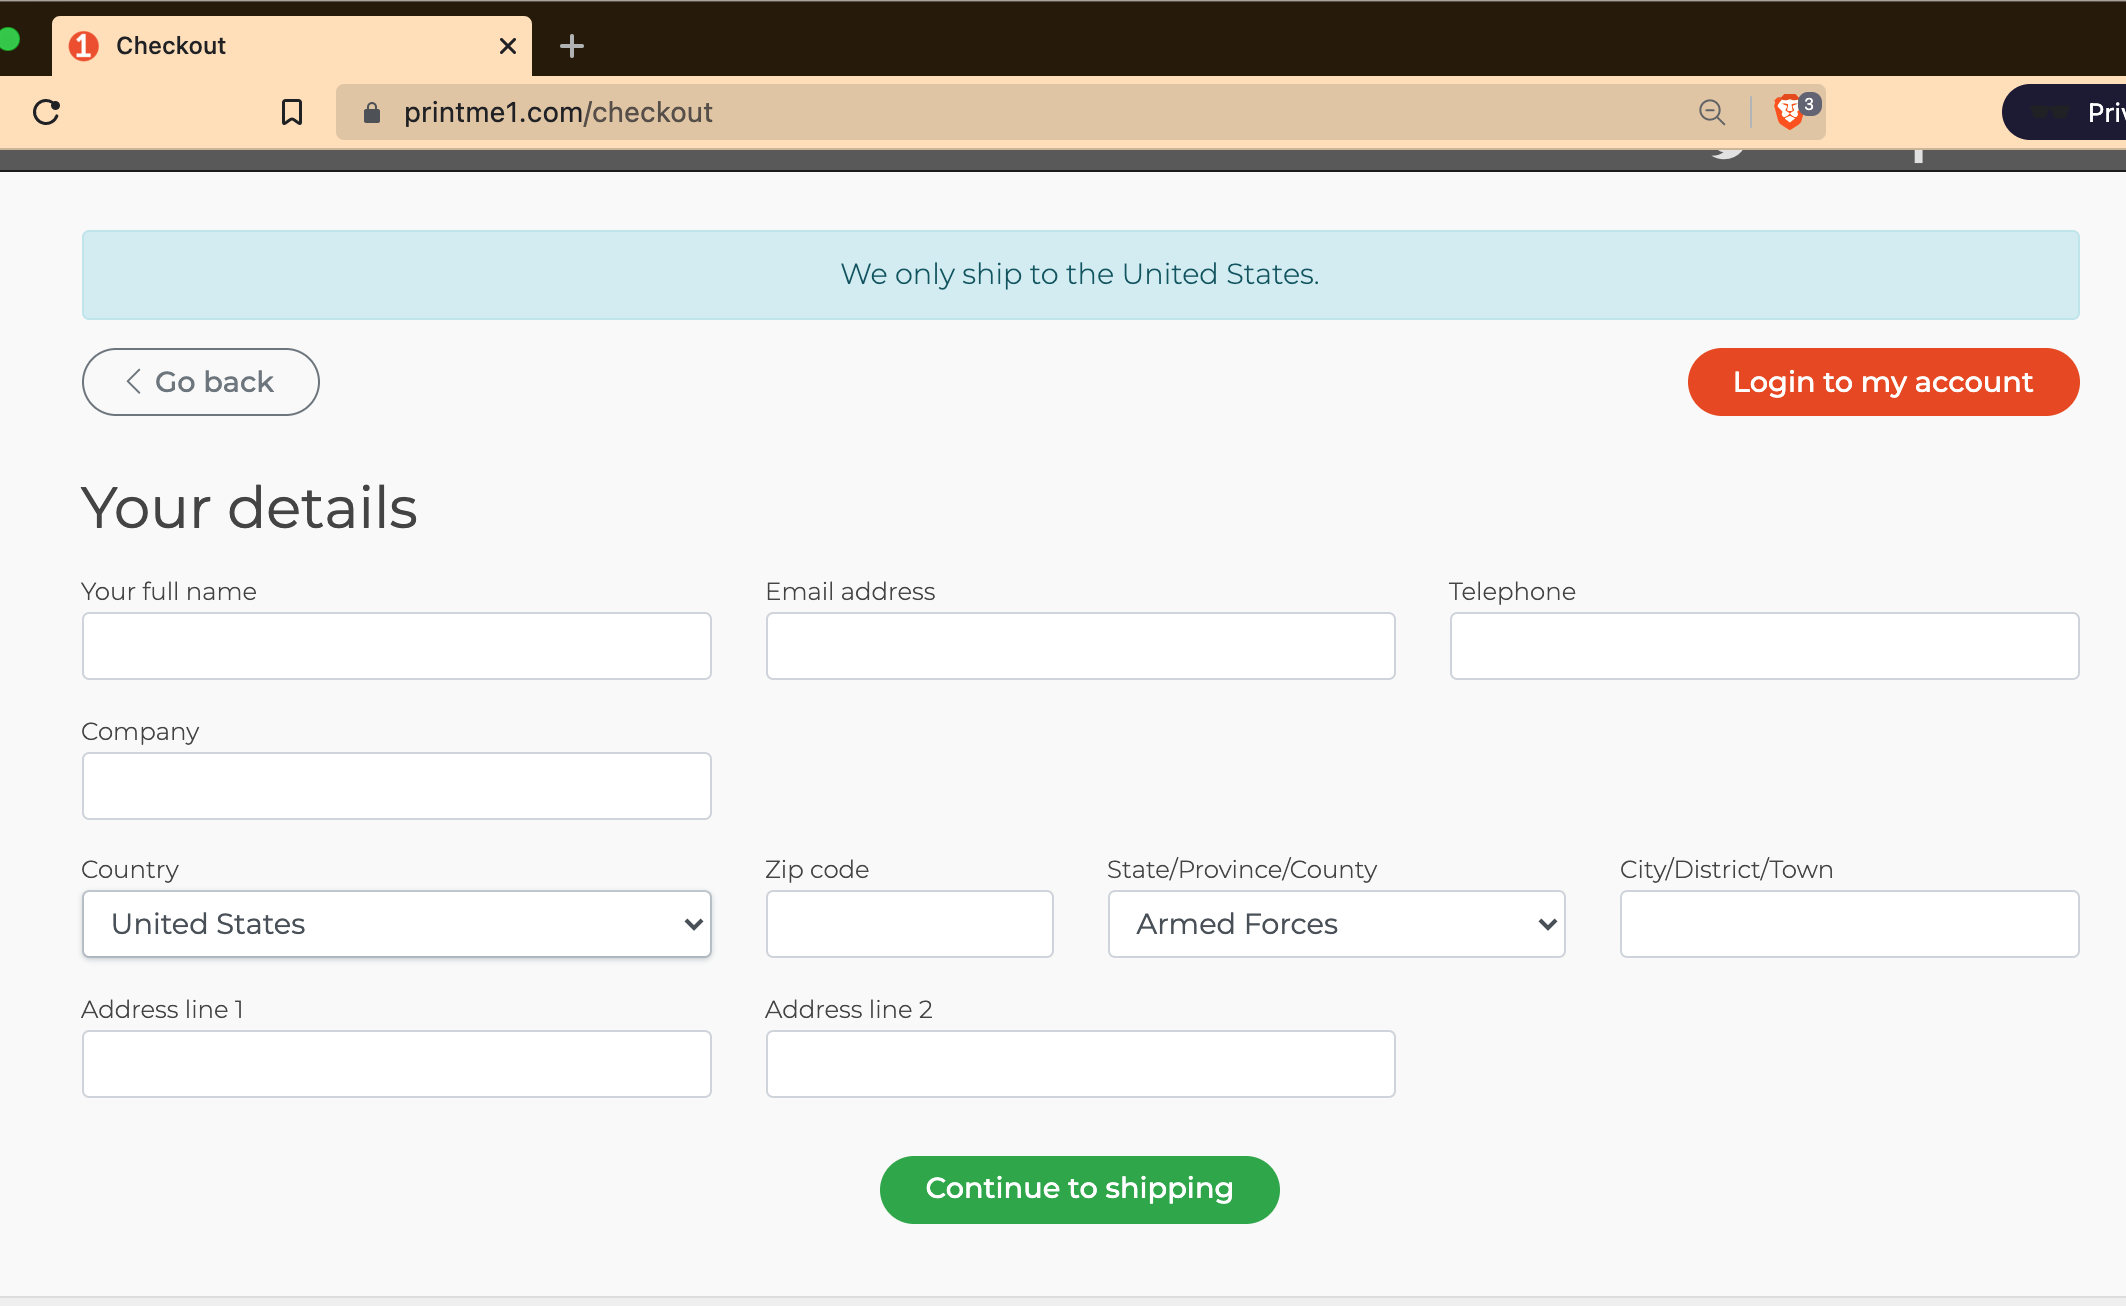
This page collects your name and the billing address for your credit card.
If you plan to pay using PayPal, enter your shipping address here.
Shipping
Shipping Features
We have a lot of unique features in shipping and will break them down here.
You can ship to your billing address (default), change your shipping recipient & address, add another address, or upload a .csv of addresses. When you add multiple addresses, the site will take the print or set of prints in your order, and send a set to each address. The price estimate will update for the additional sets.
Shipping Methods
For orders with multiple recipients, the shipping method can vary for each recipient in the same transaction.
Regarding our shipping methods, we have Standard & Priority shipping options. We currently only ship to addresses in the US and Canada.
US Options:
Standard Shipping is a hybrid UPS-USPS service, with USPS making the final delivery. Standard shipping is a 7-9 days in transit service on average.
Priority Shipping is 3-4 days in transit and is a USPS product.
Canadian Option:
Standard Shipping is 4-9 days in transit. The service uses UPS's in house customs, and final delivery is made by Canada Post. Please allow about 2 weeks to receive your print. There is an additional charge for Canadian shipping.
Please note: none of our shipping methods offers a delivery date guarantee and can take longer based on local conditions. For larger orders going to one address, we will ship at our option via another UPS product that is more suitable and offers more reliability.
Shipping to your Billing Address (Default):
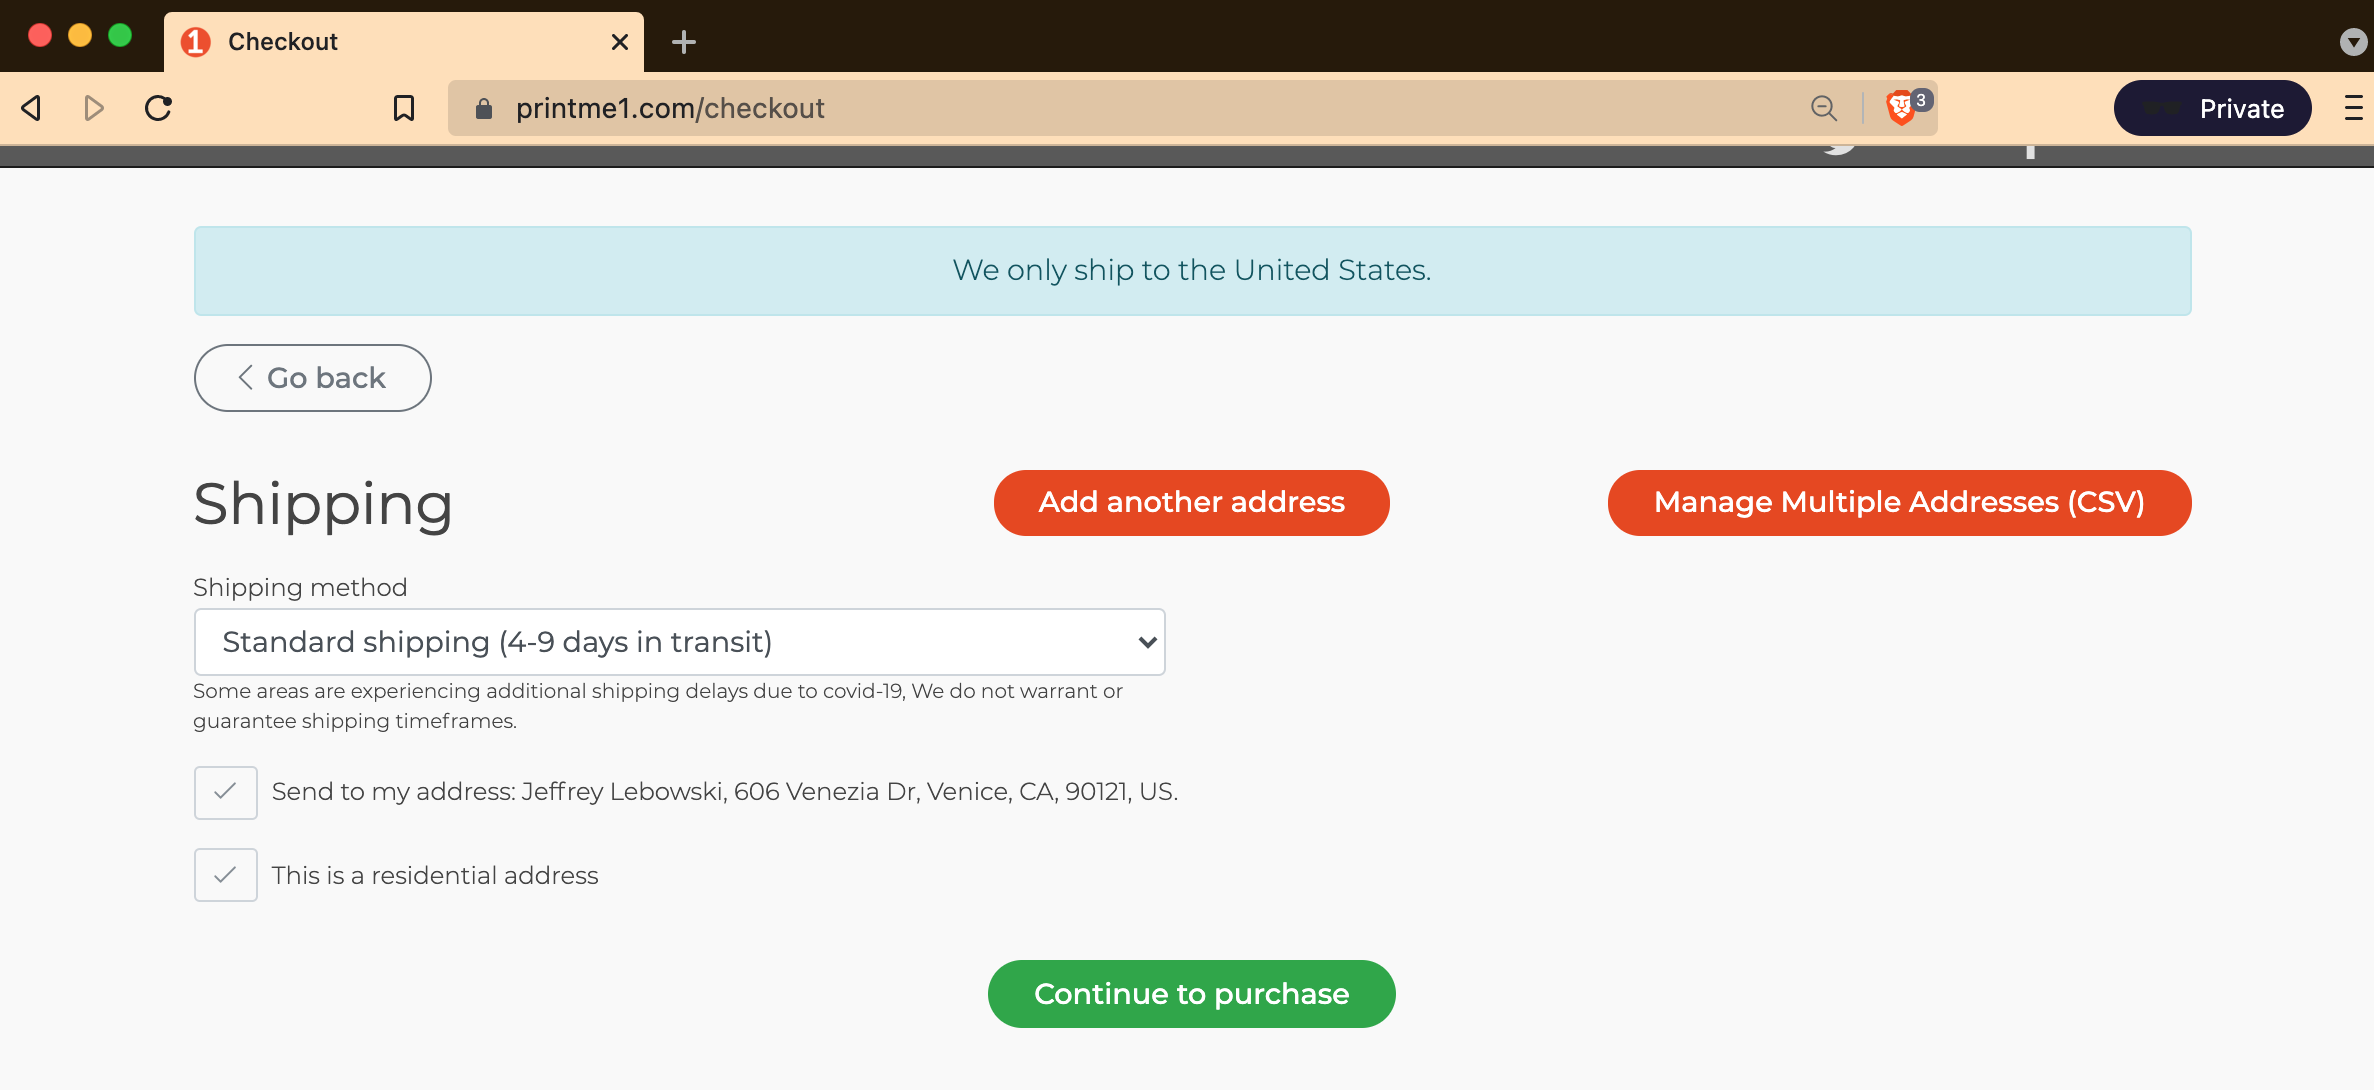
When you advance to Shipping, the default selection is shipping to your billing address. If you are only shipping your prints to your billing address, you can click the green "Continue to Purchase" button. You can change the Shipping Method here. Standard Shipping is the default, and the other option is Priority.
Changing your Shipping Address or Recipient:
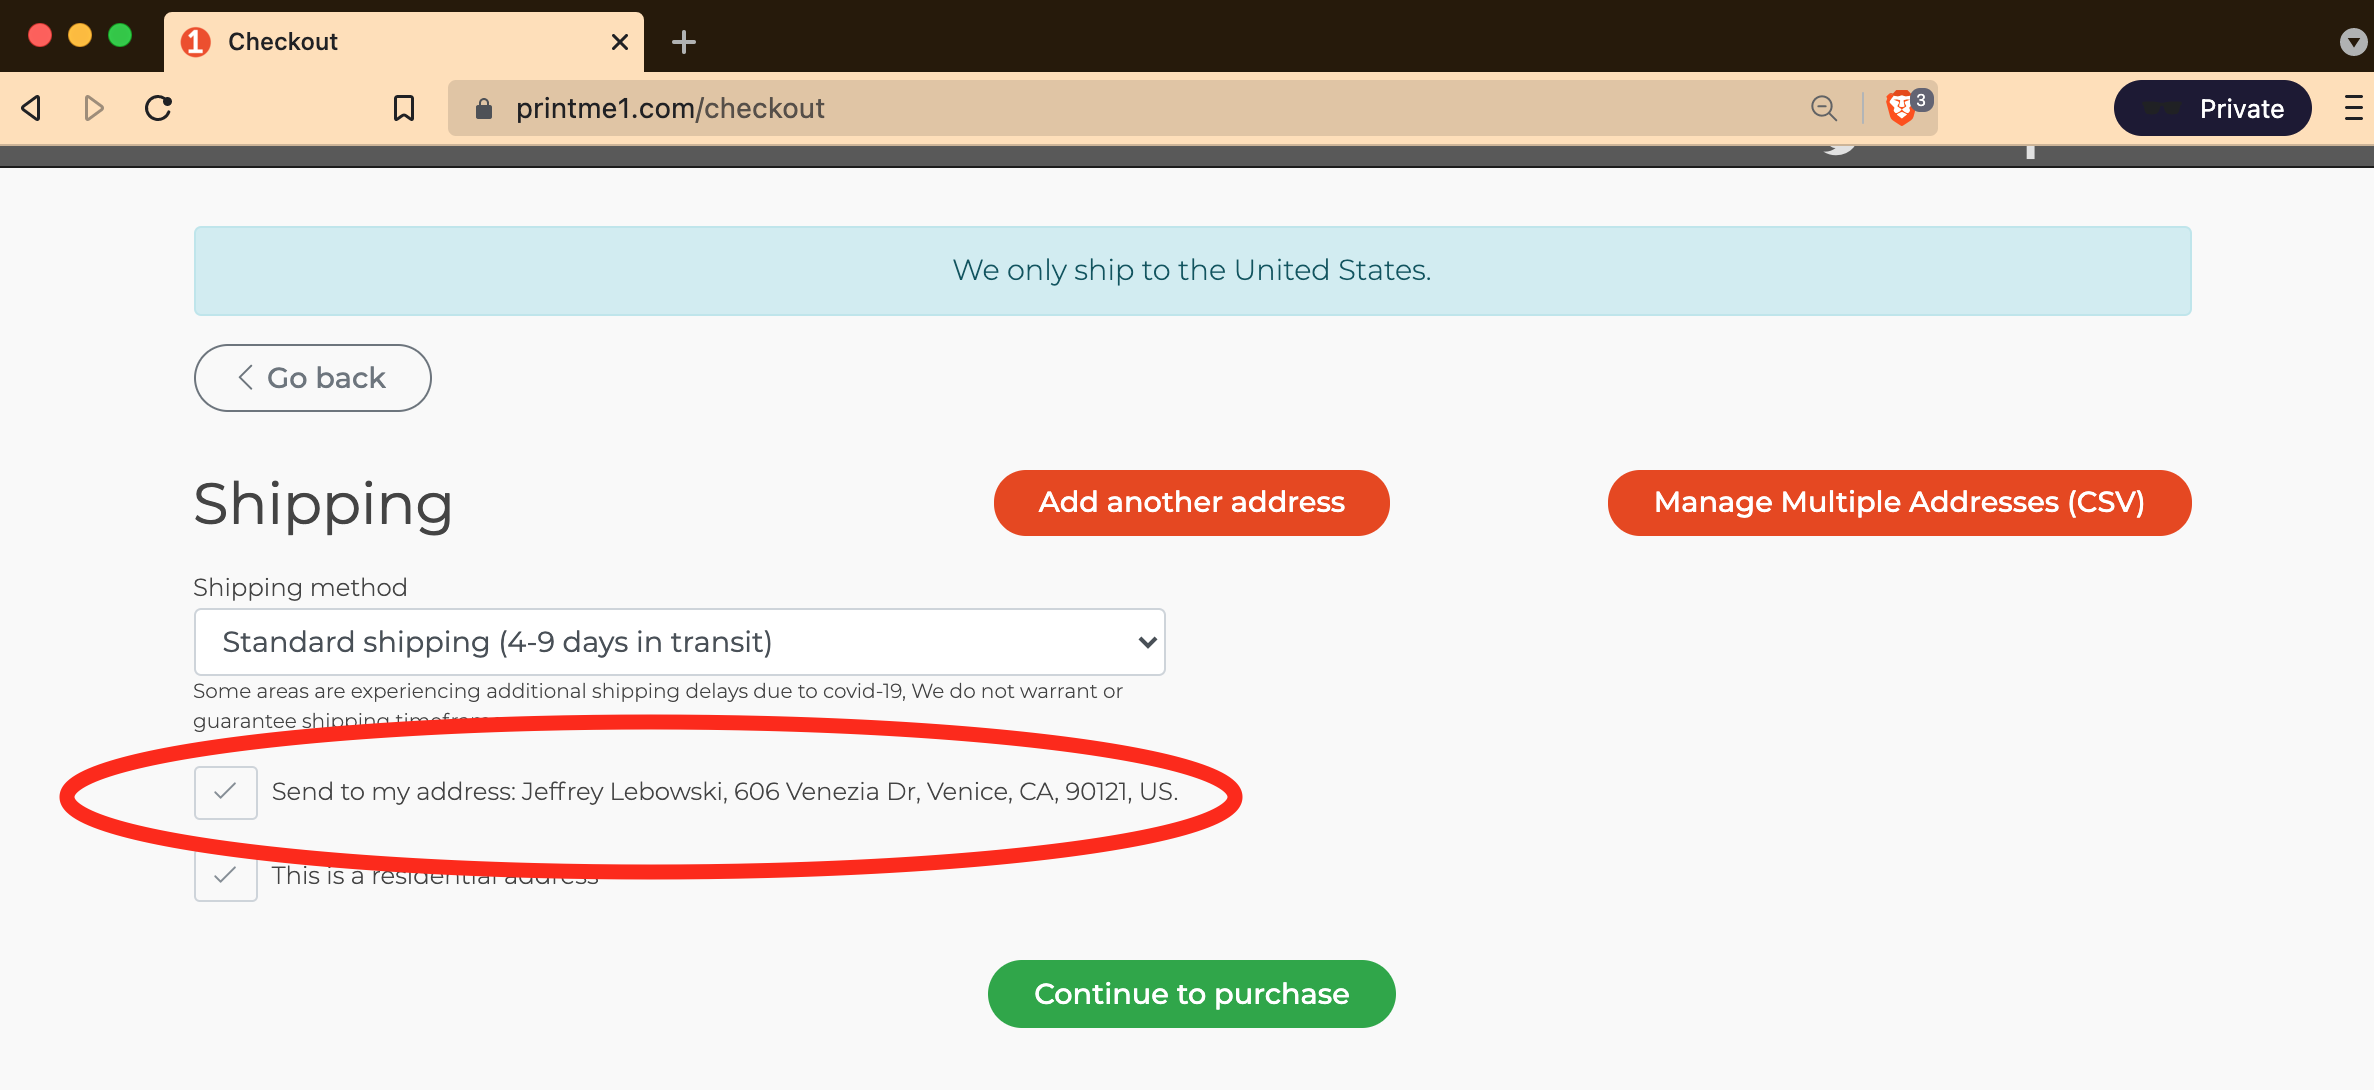
To change your primary recipient, uncheck the box for "Send to my address:…" (circled in red)
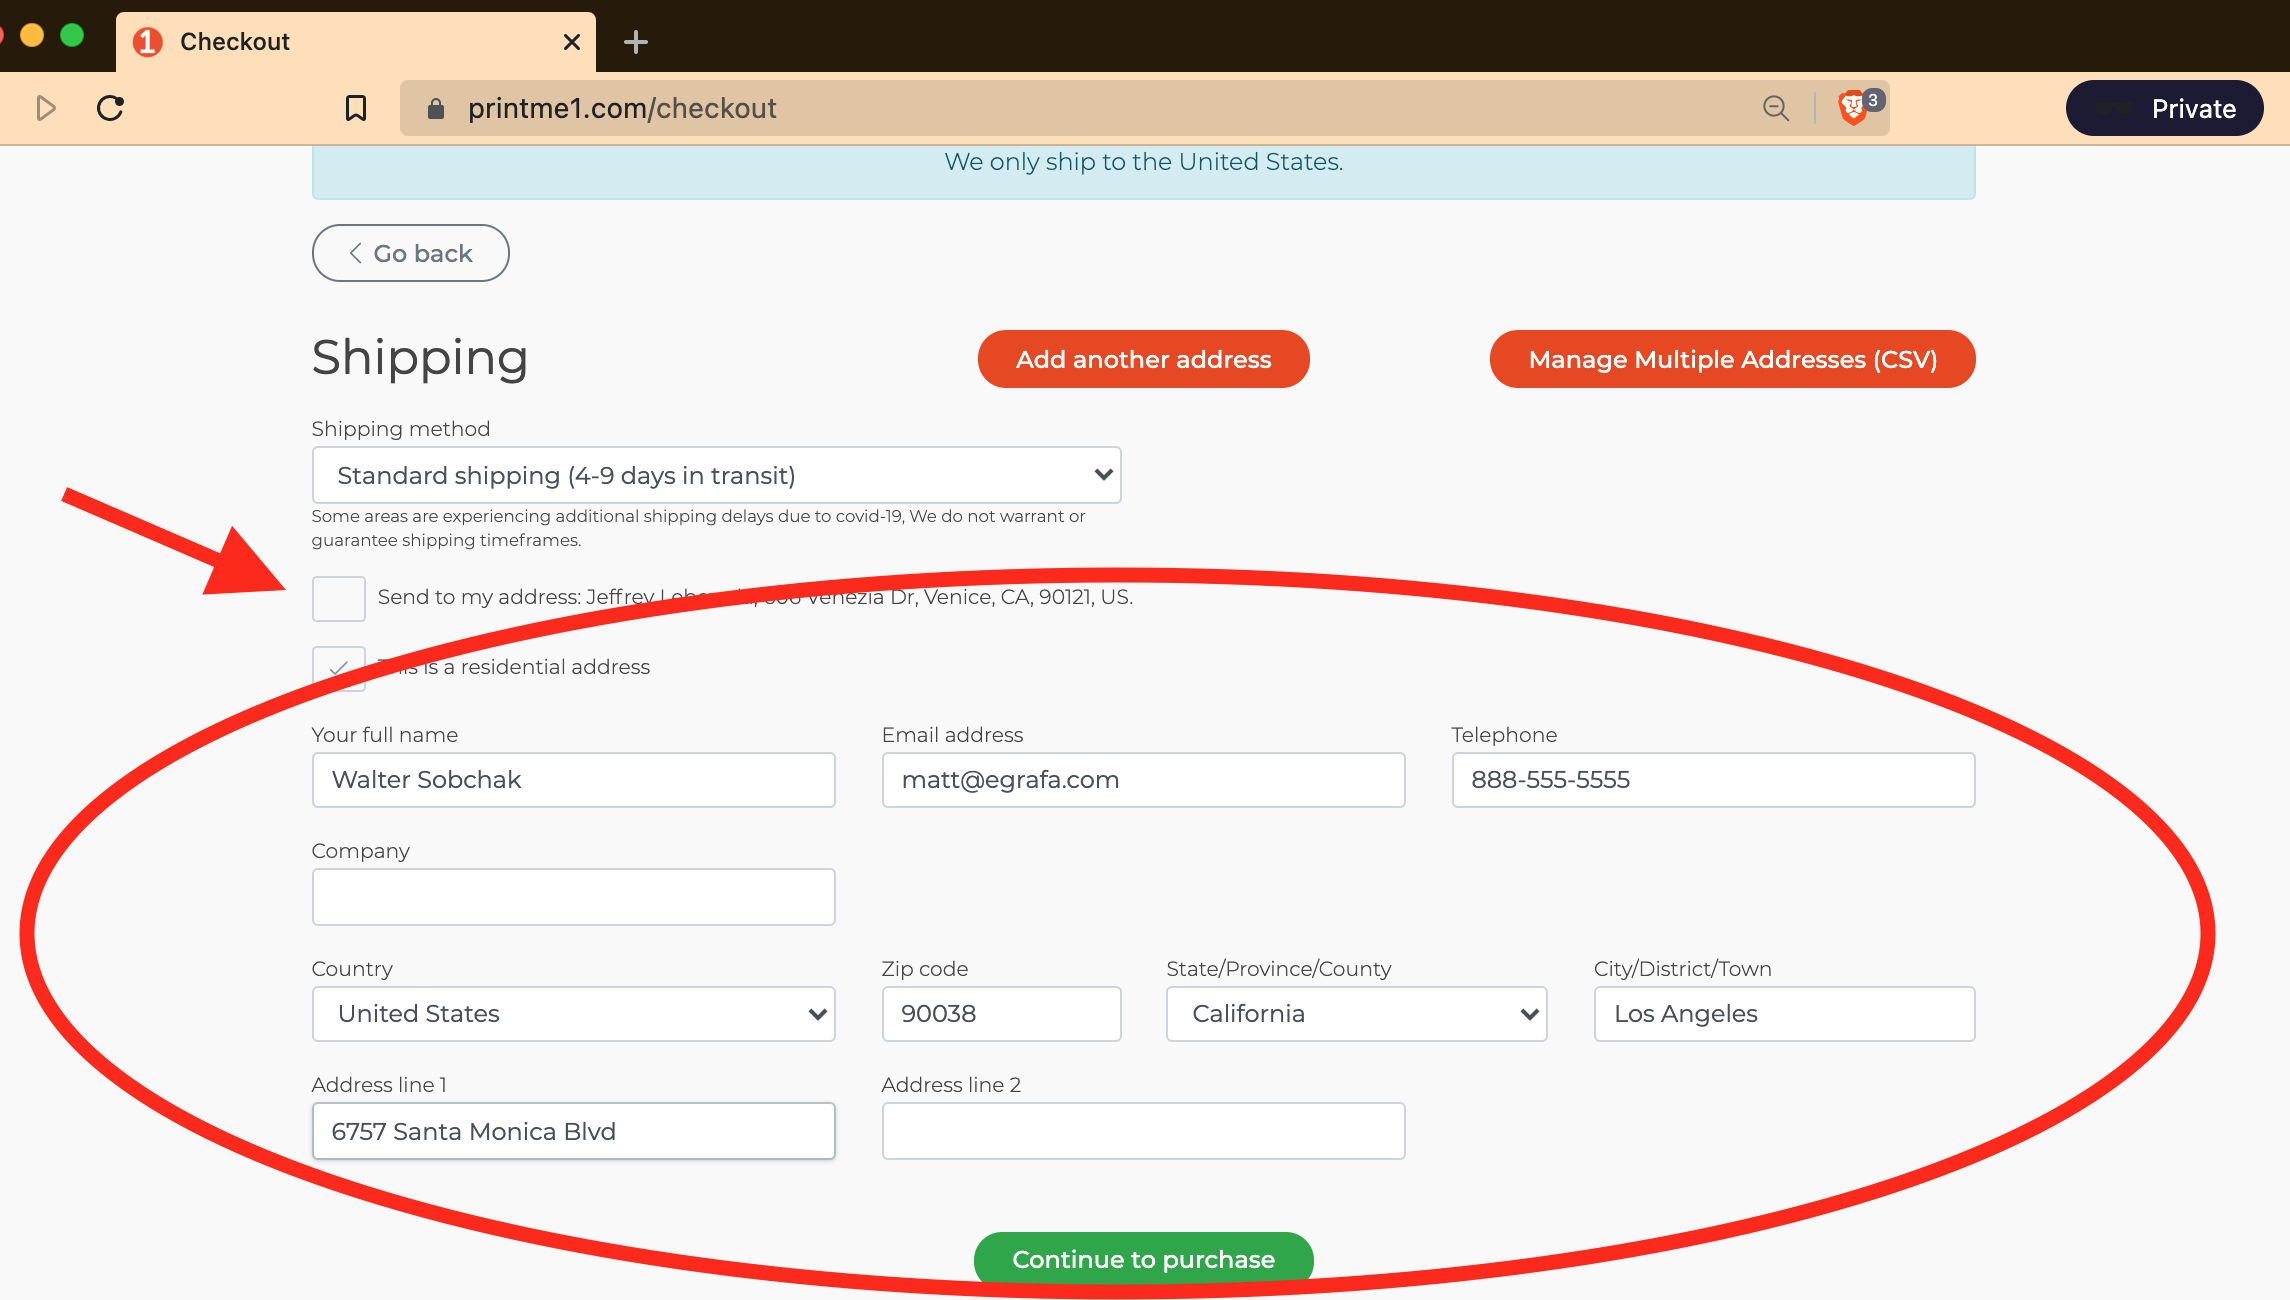
This opens up the primary recipient information. Make any changes you need to here. When completed, click "Continue to Purchase".
Important tip: Do not re-check the box for "Send to my address:…". It should remain unchecked. If you re-check the box, it will wipe your updated address and revert back to the default billing address.
Adding additional Recipients (Manually):
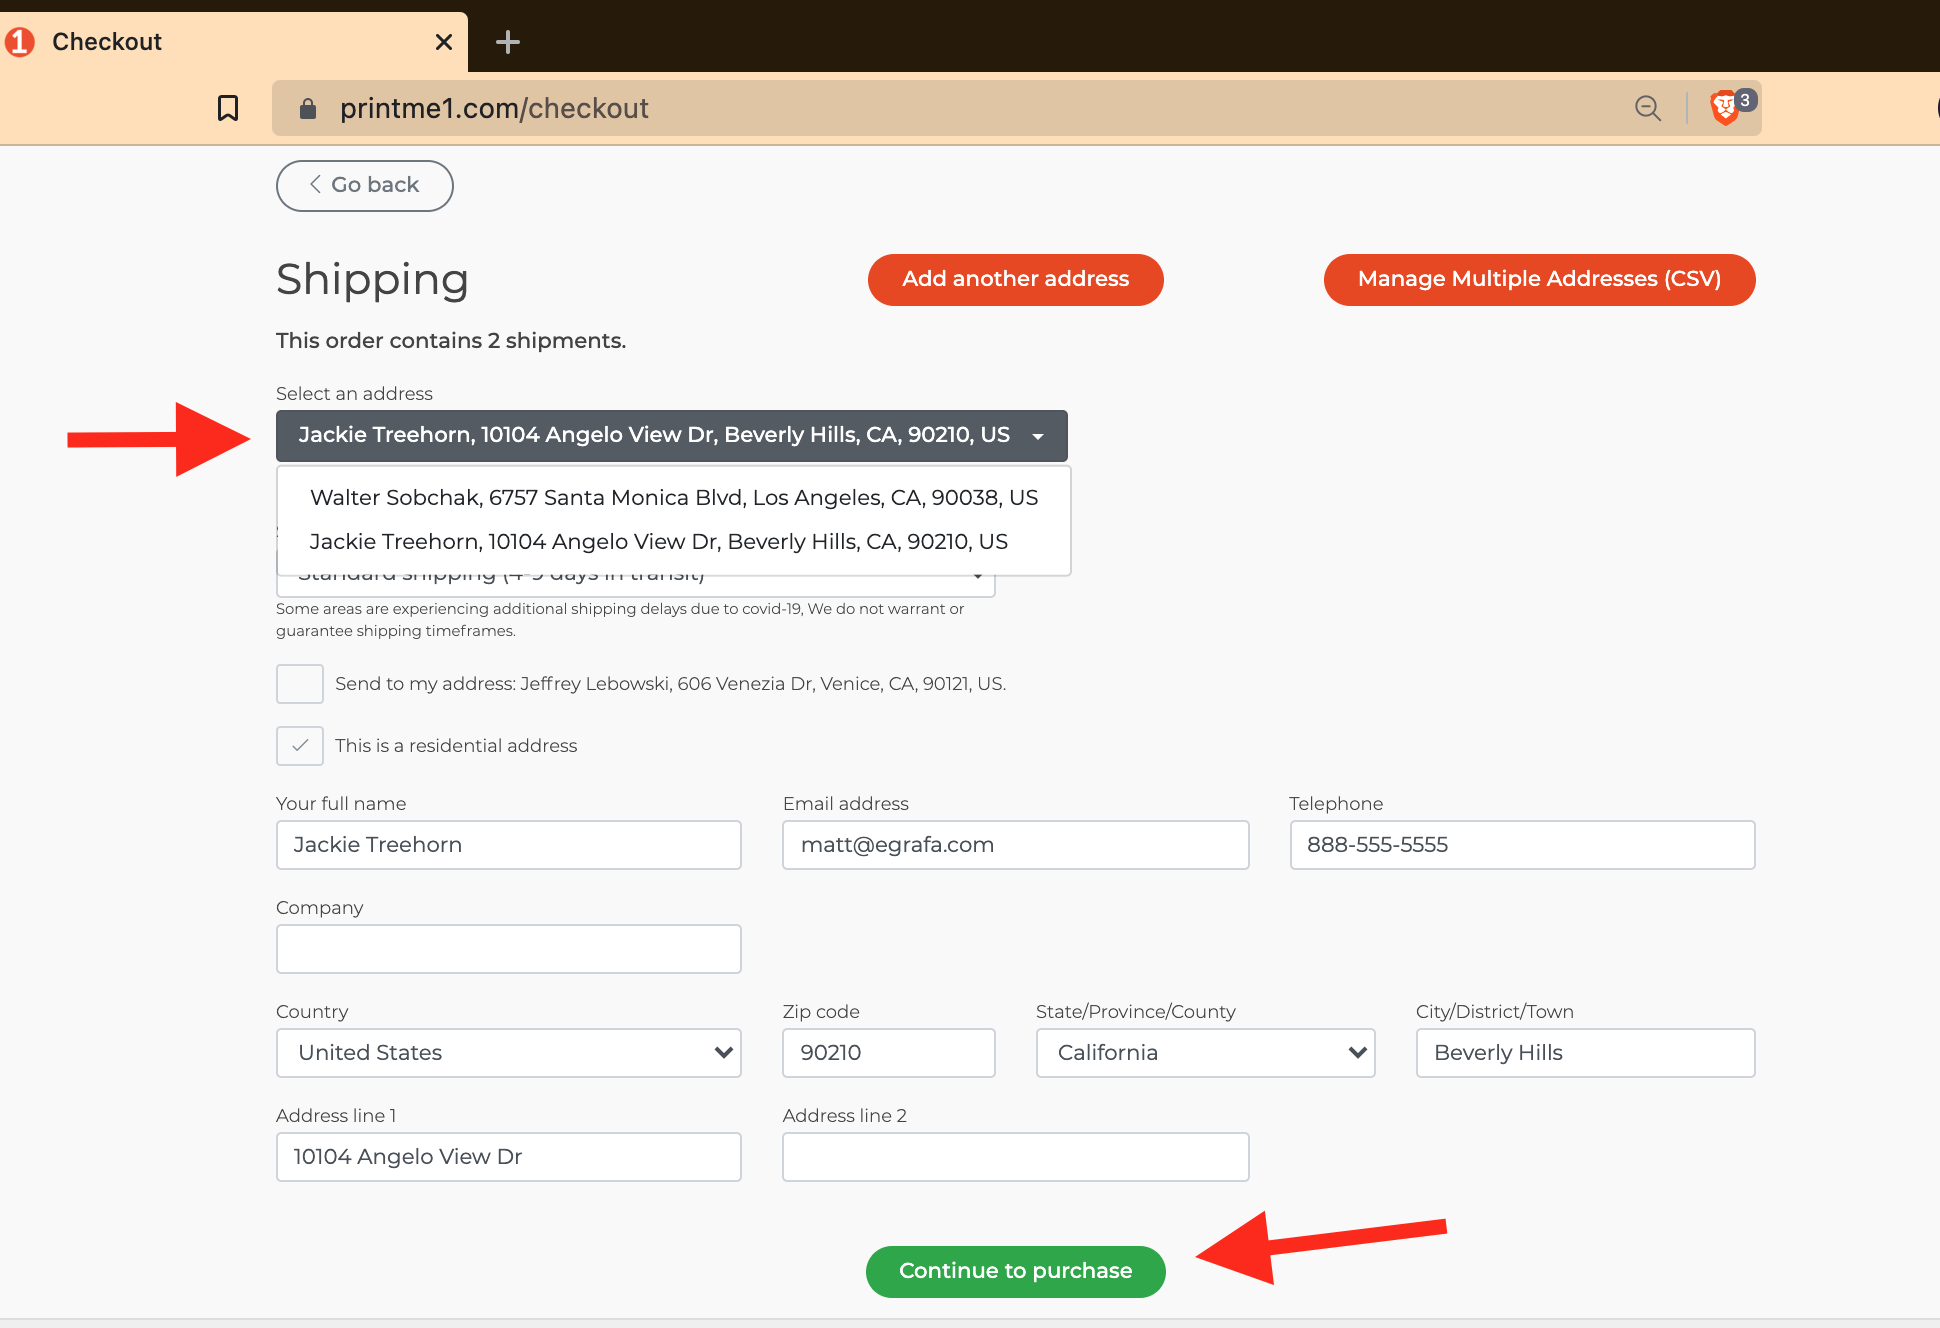
If you want to send a set of your print or prints to more than one person, use the ""Add another address" button for each additional address. This will automatically update your pricing for the additional set.
You can change the Shipping Method for each recipient.
When done inputting an address, click the green "Save new address" button. Repeat as needed. The site will automatically update the price for the additional prints and shipping.
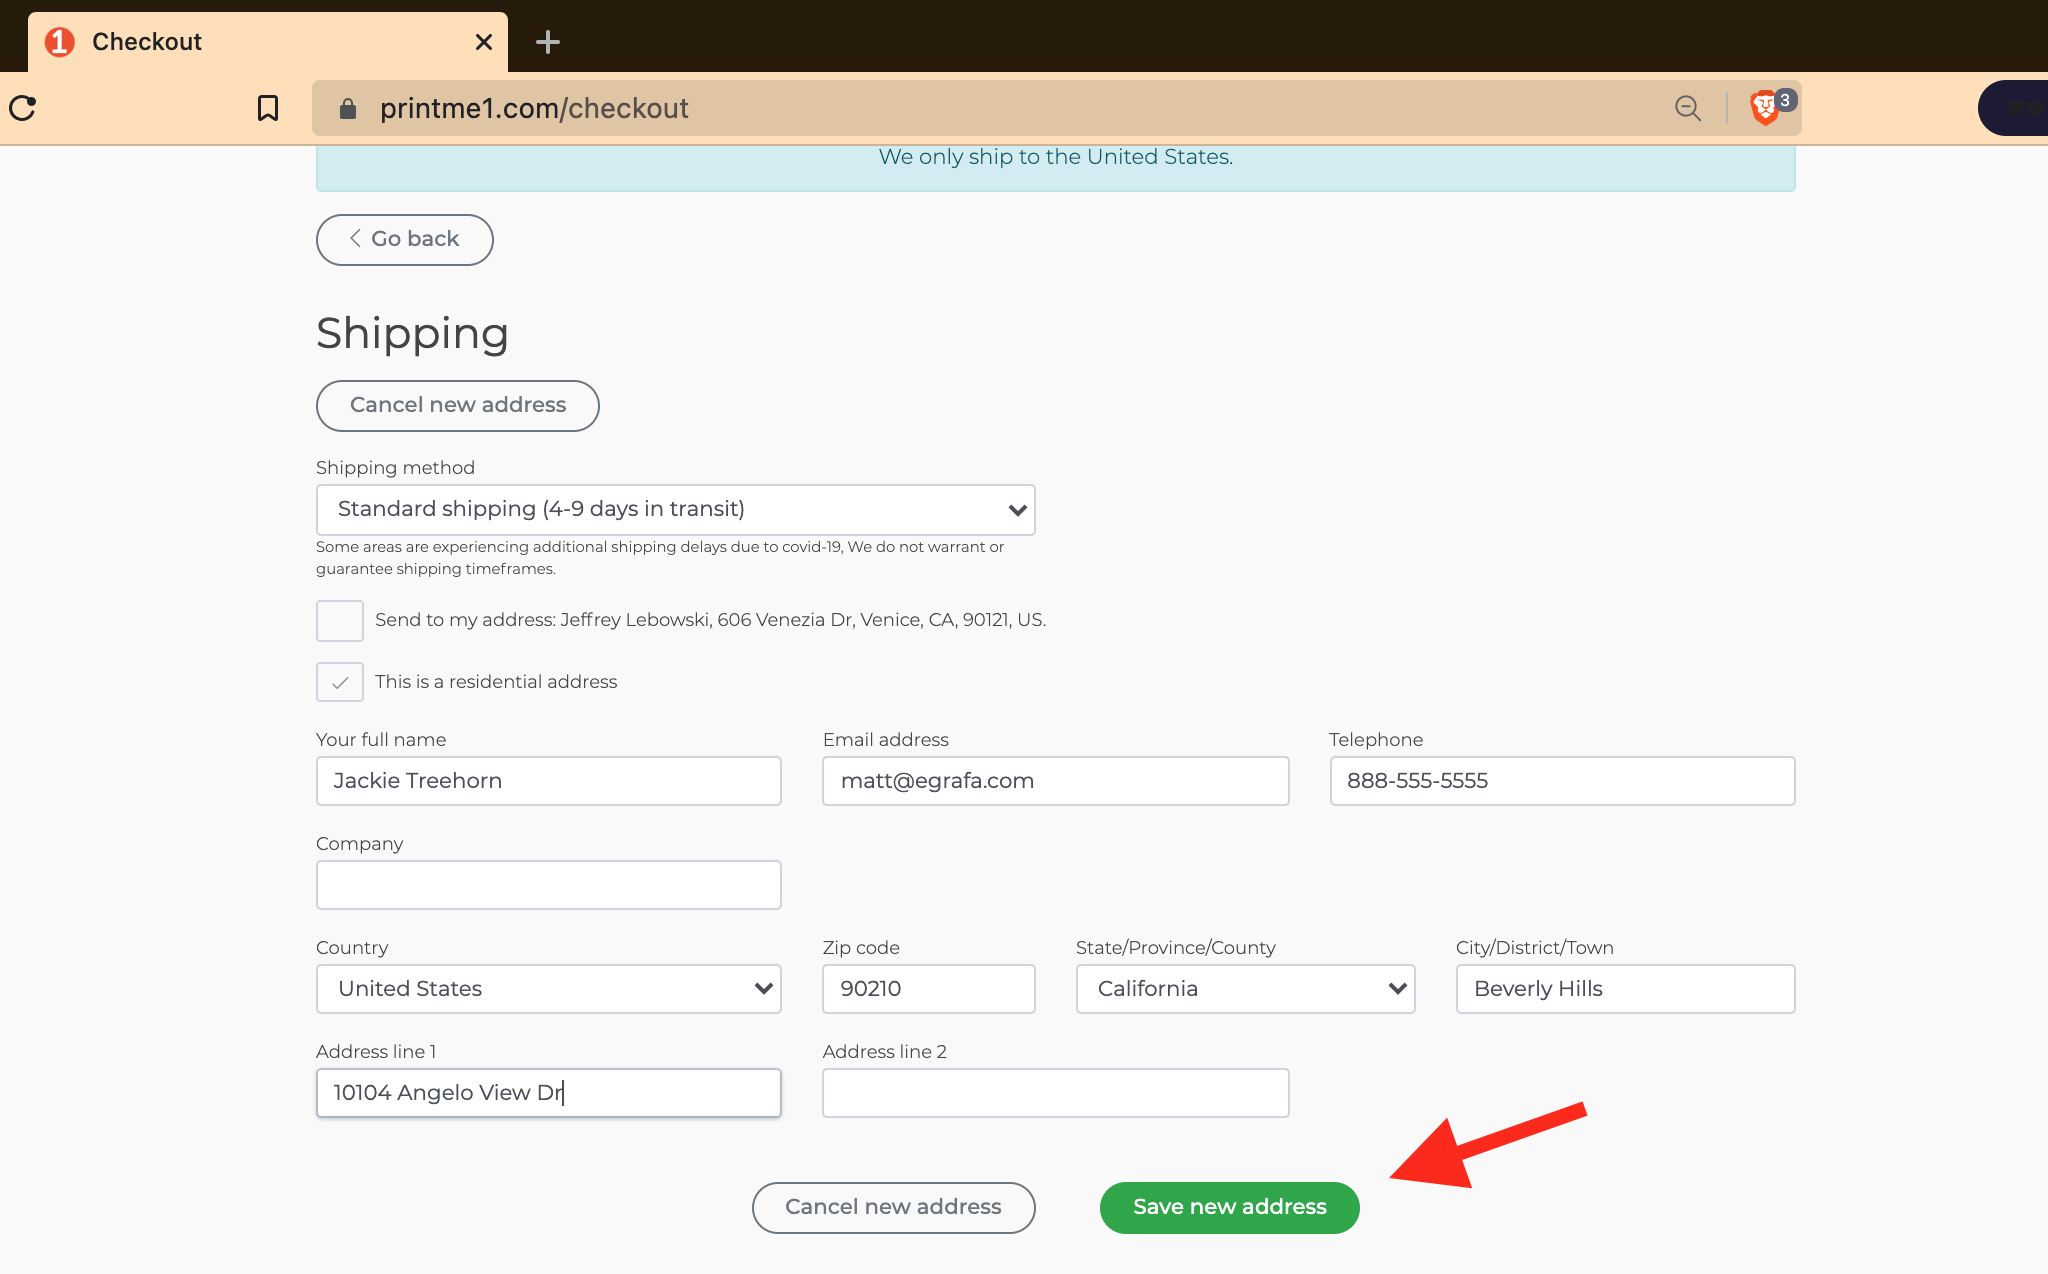
If you have added multiple addresses and want to review them or make changes, click the Recipient dropdown, and select the recipient you want to review or change. Click Continue to Purchase to advance.
Adding Additional Recipients by CSV
If you have a list of recipients stored in a spreadsheet and too many to input manually, our site will accept a CSV file. Click "Manage Multiple Addresses (CSV)". This will overwrite any of the previous shipping inputs. Our site allows you to ship one PDF to many people, or specific PDF's to specific people. All in one transaction.
For a detailed explanation on how to set up a CSV for this feature, and other capabilities using a CSV, please check out this post.

Clicking this will open a page that includes formatting instructions for your CSV file.
If you just have addresses and leave the filename column blank, each recipient in the CSV will receive the same PDF or set of PDF's.
If you want recipients to get specific PDF's, each row with a filename will go to the recipient in the row. If you want the recipient to receive more than one or specific PDF's in the same shipment & transaction, just repeat recipient's details for each PDF filename. Our site will automatically recognize multiple shipments going to the same address and aggregate them into one shipment here.
The site will automatically update the price for print or set of prints going to each address, and if any addresses have Priority shipping, include any additional shipping charges in the estimate.
If you need assistance on using the CSV feature, please contact us.
Review Details and Check Out
The next to last step is to review your order details. The order is presented with each address appearing with its shipping method, then the PDF prints that are sent to each address. You can delete a PDF from the order by clicking the red X.
Payment Options
If everything is correct, the last step is payment. Please note when you place an order with us, you are placing a firm non-refundable order for custom materials. Once the payment confirmation is received, moments after you input payment, your PDF's are transmitted to the print shop's print queue.
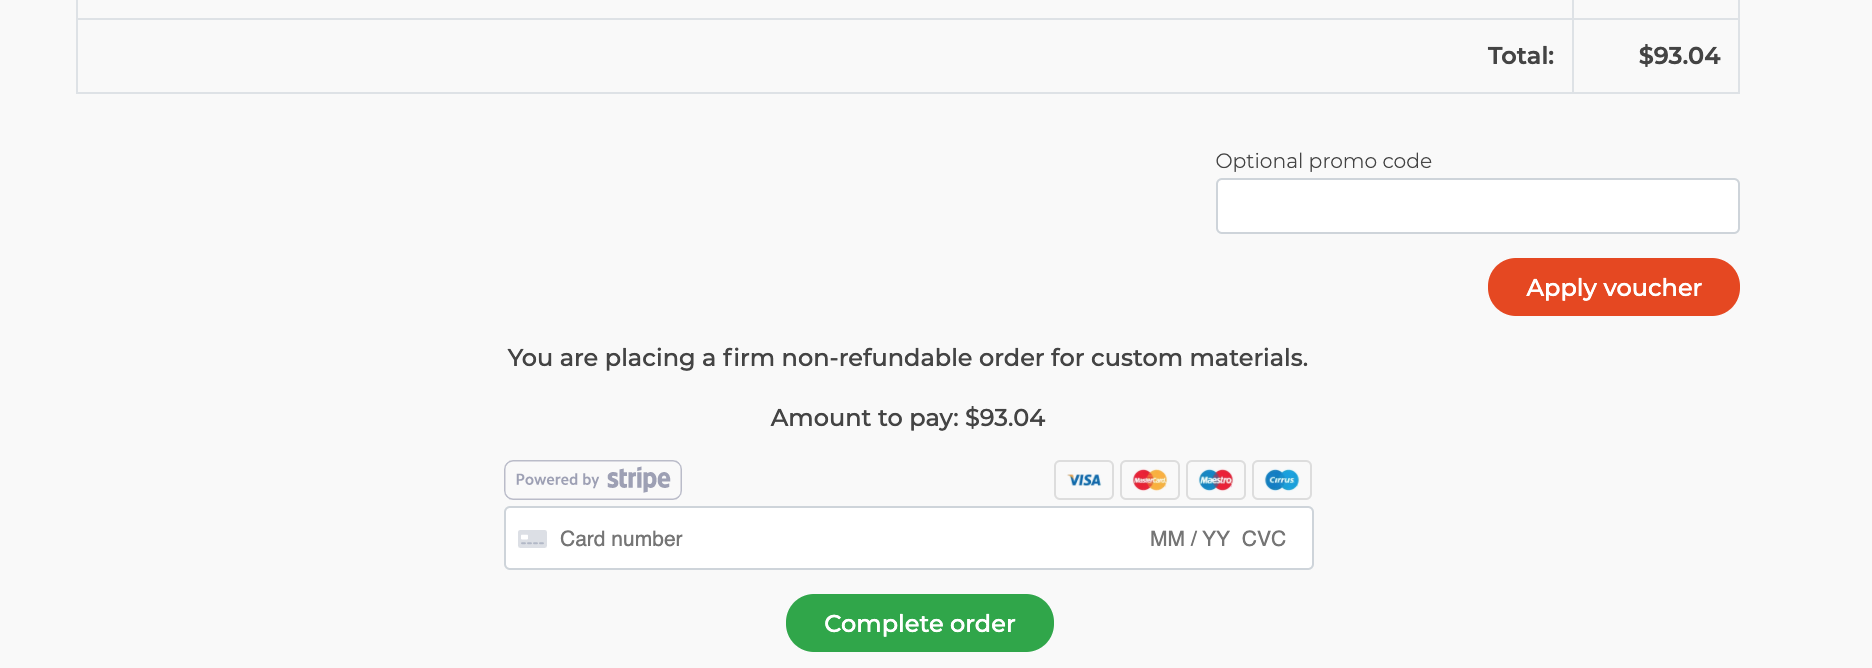
We have three payment methods for a typical order:
Pay by Credit Card:
We accept credit cards through our processor Stripe for transactions involving all features we offer.
Pay by Paypal:
We also accept Paypal, but only for simple traditional orders where there is one recipient.
Pay from Account Balance (Topup):
You can also pay from an account balance associated with the account you are using. This is useful if you are delegating the ordering process to another person in your organization and either don't want to give them your credit card or purchasing card details, or don't want to have to reimburse them later. With this feature, you can Topup your account by logging in, and clicking "Balance", then clicking "Topup" to add funds. Then provide your associates with the log-in information to your printMe1.com account and instruct them to pay from the balance.
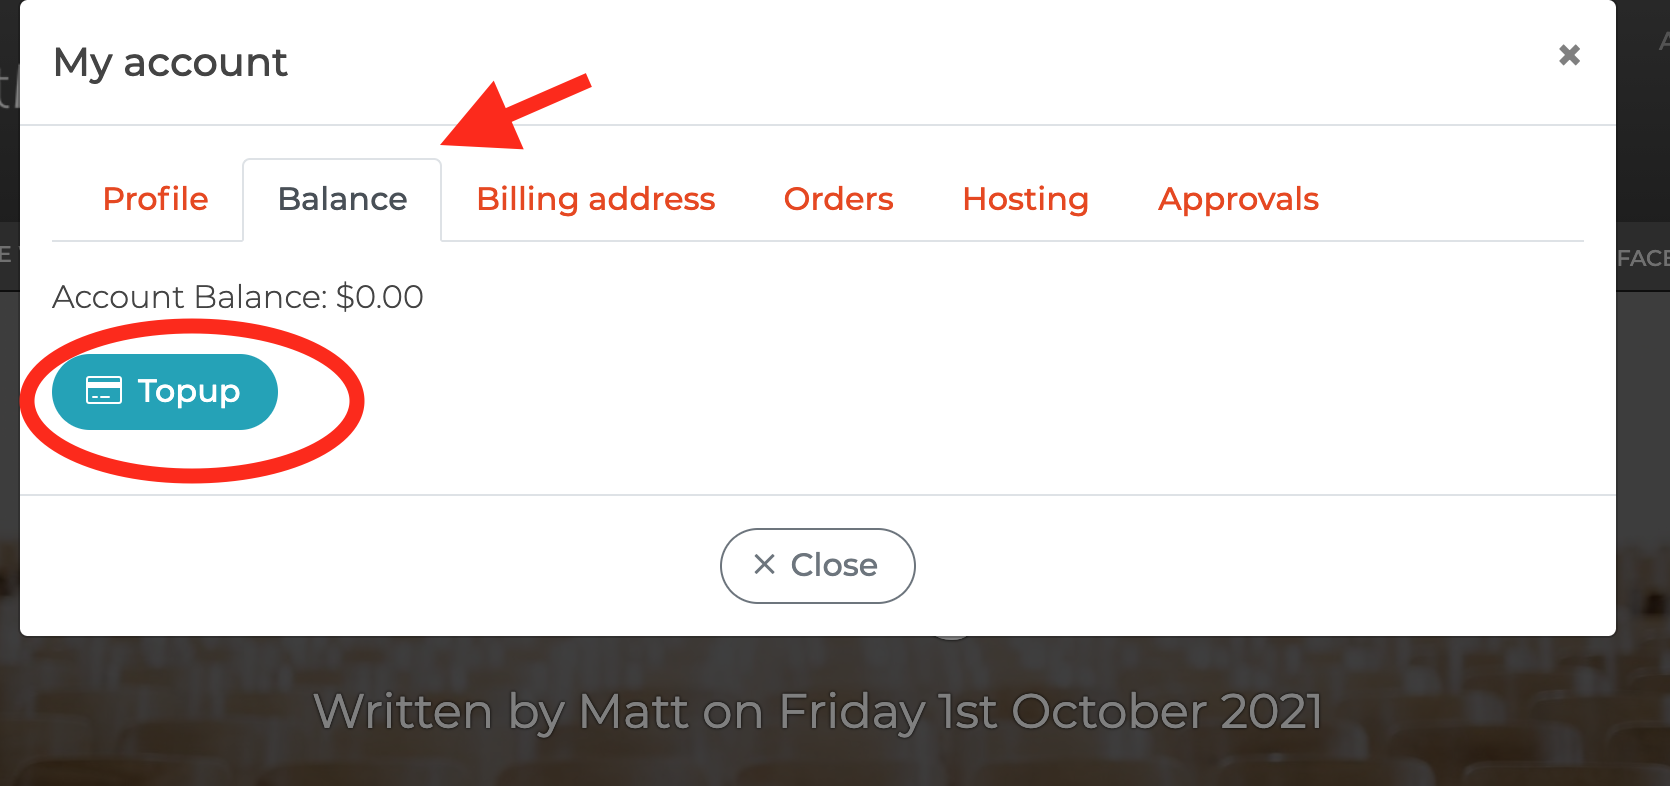
When they place their order while logged-in, in payment, the account balance and option to use the balance to pay will appear in payment on the final payment page. This Topup and Account Balance feature is managed by our credit card processor, Stripe.
Note: If you want to provide specific prints to clients/users/student for no charge, this is accomplished by using this feature with our PDF Hosting feature.
Done! What happens next?
If this is your first time using the site, you'll be offered the chance here at the end to create an account using the email you used. If you create an account, your main address, and order and shipping/tracking details will be stored in your account.
As soon as your payment is confirmed, immediately after clicking the payment button for most types of orders, you'll get a confirmation email. For most orders, we have your print or prints ready for shipping within 48 business hours.
For orders over 75 sets or more, please allow 1 additional day per 75 sets/deliverables in an order.
Once your order is printed and boxed, you receive an email with tracking information. If you placed multiple orders in the same batch going to the same address with the same shipping method, they are automatically aggregated and shipped in the same box.
Customer Review
"VERY pleased with my order!
I'm an author who needed a handful of beta copies of my 160-page book printed in color. PrintMe1 was by far the most affordable choice, even when I needed the copies rushed to my address.
I expected to get what I was paying for - nothing fancy, pages missing, illegible pages, late delivery - all the nightmares I've experienced with other printing companies over years.
Instead, I received a solid box the post office couldn't destroy (though not for lack of trying), and sealed as though it contained priceless artifacts. When I opened it, I found packing paper artistically knotted to keep the copies from shifting in transit, and three sealed paper packages to ensure nothing worked its way between the pages in shipment.
In twenty years of training with manuals (including having to help wrangle them to remote training facilities), I've never seen a printer do this much to make sure the books looked nice.
I couldn't be happier and definitely recommend PrintMe1 for excellent printing and attention to detail!"
-Jen C.
Conclusion
This is a tutorial explains how to print, bind, and ship a PDF using printMe1.com. Most users are printing one PDF to ship to their own address. The tutorial we showed here involved two PDF's going to two address, and also showed the different features of the site regarding printing PDF's and then shipping PDF's to multiple addresses.
To use the site to print a PDF, a user first uploads their PDF by clicking the green "Start Now" button. If the user has more than one PDF to print, all PDF's can be selected at once using a "Command"+"Shift" click on their computer, then selecting just the PDF"s they want to upload. Users can choose a different printing type, binding type, and quantity for each PDF they upload. If the user uploaded more than one PDF, they can toggle through the details for each PDF by clicking the filename in the drop down menu on the first checkout page.
The user inputs a billing address, which is the default shipping address. The shipping address and recipient details can be changed by deselecting the "Send to my address…" box. If the user wants to ship additional sets of the PDF or PDF's to additional recipients, the user can manually input the additional addresses by clicking "Add additional address", then clicking "save new address" for each one. If the user has a lot of addresses and if the addresses are stored in a spreadsheet format, the user can click "Manage multiple addresses (CSV)" and upload a CSV file of addresses. If the user has multiple addresses, they can be reviewed by clicking the lead address in the drop down menu, then selecting the next address they want to review. The site automatically updates the estimate for printing and shipping based on the additional addresses.
Typical orders involving one PDF and one address can be paid for by both credit cards and Paypal. Orders that involve multiple addresses are not able to paid for using Paypal and need to use a credit card. There is also the ability to pay using a pre-paid balance (aka Topup) associated with the account.
While this is a very detailed tutorial, the typical order is placed in a minute or two after PDF uploading is completed.
Please also take a look at our How It Works page and FAQ for more information.
"Simple Print Service" is a trademark of egrafa, inc. D/B/A printMe1.com


![Single-Sided PDF Printing [Updated 4-8-24]](http://public/images/530/blog/upload/25b15134-header.jpeg)


![PDF's of enacted US Laws, Federal Court, and other US publications reformatted for Easy-to-Read Printing in US Letter Formats- Free downloads [Updated 8/15/25]](http://public/images/530/blog/upload/5aed875-abraham-lincoln-memorial-1920x1080.jpg)


